Pages

Showing posts with label breakfast. Show all posts

Monday, February 4, 2013

Glazed Donut Muffins


I'm not sure it gets any better than donuts. I love chocolate, cake, candy, ice cream - any sweet food under the sun! But donuts are where it's at. If I drive by a DD it takes everything in me to not stop and get 2 a donuts. Naturally I was drawn to this recipe.

I baked them up and they sit in my freezer until I pop one out. I usually try to take slivers at a time to make it last half the day

I went with the double dip method on the glaze and next time I would even triple dip, because I had enough icing left over. I would cook them at the 15 minute mark too. Last time I did 17 and I just find the very bottom a little too done for me, but overall these are a keeper!

Glazed Donut Muffins (from My Baking Addiction) - makes 12
 1/4 cup butter

1/4 cup vegetable oil
1/2 cup granulated sugar
1/3 cup brown sugar
2 large eggs
1 1/2 teaspoons baking powder
1/4 teaspoon baking soda
3/4 to 1 ¼ teaspoons ground nutmeg, to taste (I used ¾)
1 teaspoon cinnamon
3/4 teaspoon salt
1 teaspoon vanilla extract
2 2/3 cups all-purpose flour
1 cup milk

Glaze
3 tablespoons butter; melted

1 cup confectioners’ sugar; sifted
3/4 teaspoon vanilla
2 tablespoons hot water


Preheat the oven to 425°F. Lightly grease a standard muffin tin. Or line with 12 paper muffin cups, and grease the cups with non-stick vegetable oil spray; this will ensure that they peel off the muffins nicely.

In a medium-sized mixing bowl, cream together the butter, vegetable oil, and sugars till smooth.

Add the eggs, beating to combine.

Stir in the baking powder, baking soda, nutmeg, cinnamon, salt, and vanilla.

Stir the flour into the butter mixture alternately with the milk, beginning and ending with the flour and making sure everything is thoroughly combined.

Spoon the batter evenly into the prepared pan, filling the cups nearly full.

Bake the muffins for 15 to 17 minutes, or until they’re a pale golden brown and a cake tester inserted into the middle of one of the center muffins comes out clean.

In a medium bowl, prepare the glaze by mixing together the melted butter, confectioners’ sugar, vanilla and water. Whisk until smooth.

When muffins have cooled slightly, dip the muffin crown into the glaze and allow the glaze to harden. At this point, you can leave them as is or go for the double dip. I glazed my muffins twice.

Serve warm, or cool on a rack and wrap airtight. Muffins will keep at room temperature for about a day or store in the freezer, individually wrapped.


Friday, February 1, 2013

Cinnamon Baked French Toast


Overnight French Toast has really made its mark on the blog world over the past 2 years or so. I've been wanting to try it, but put it on that Christmas Morning list that I told you about before. I decided to go with this Pioneer Woman version. It was sweet with a crunchy cinnamon topping, which added a lot of texture and flavor. I loved that it made a lot so we were able to eat it over a few days, but also that I did all of my work ahead of time.

I am still wanting to try a lot more recipes. There are some blueberry ones and some with no topping that look completely delicious, but I always know that I have this one up my sleeve. Have you tried an overnight breakfast dish yet? It's perfect for if you have company or if you know you will jsut want to be lazy in the morning. Hey, that's how I feel everyday!

Cinnamon Baked French Toast (from Pioneer Woman)
1 loaf French Bread - I used sourdough
8 large eggs
2 cups milk (we used skim, but Ree uses whole)
½ cup heavy whipping cream
¾ cups granulated sugar
2 tablespoons vanilla extract

Streusel Topping:
½ cup all-purpose flour
½ cup brown sugar
1 teaspoon cinnamon
¼ teaspoon salt
1/2 cup cold butter, cut into pieces

Spray a 9 x 13-inch baking pan with cooking spray. Tear French bread into chunks, or cut into cubes, and evenly place in the pan.


In a large bowl, mix together eggs, milk, cream, sugar, and vanilla extract. Pour evenly over bread. Cover pan with saran wrap and store in the refrigerator for several hours or overnight.

In a separate bowl, mix together flour, brown sugar, cinnamon, and salt. Add butter pieces and cut into the dry mixture using a fork or your hands. Combine until the mixture resembles sand with a few pea sized chunks. Cover and store mixture in the refrigerator.

When you’re ready to bake the French toast, preheat oven to 350 degrees. Remove casserole from refrigerator and sprinkle crumb mixture over the top. Bake for 45-55 minutes, or until the French toast is set and golden brown.

Serve warm with butter and maple syrup.


Wednesday, January 30, 2013

Cream Cheese Danish


Any kind of cheese is fine by me. Add it to something sweet and it's even better. I remember eating entenmanns cheese danish when I was younger. It was a treat and I really loved it. Soemtimes when I pass it in the store I am so tempted to purchase it - but being the only sweet eating in my house, I bring myself back to the reality that I would gain 5 pounds if I put it in my cart. Come on Remy, grow up and eat lots of good stuff with Mommy!!

This past year I really wanted to try out some recipes to become traditional holiday foods. So this was on my Christmas morning list. Surprisingly, Adam liked it! He is not a sweet eater at all, as I've mentioned before, so I was loving that he enjoyed it. I made it the night before but it was easy enough that I should have made it that morning.

Next time I would love to try this individual cheese danish recipe. They look so yummy!

Cream Cheese Danish (from The Adventures of Kitchen Girl)
2 cans ready to use refrigerated crescent rolls
2 8-ounce packages cream cheese
1 cup sugar
1 teaspoon vanilla extract
1 egg
1 egg white

Glaze:
1/2 cup powdered sugar
2 Tablespoons milk
1/2 teaspoon vanilla extract

Preheat oven to 350 degrees and grease a 13X9-inch baking pan.

Lay a pack of crescent rolls in the pan and pinch the openings together.

Beat the cream cheese, sugar, vanilla, and egg together until smooth. Spread the mixture over the crescent rolls evenly and then lay the second pack of crescent rolls on top of the cheese mixture and brush with egg white.

Bake for 35-45 minutes until the top is golden brown. Top with glaze after cooling for 20 minutes

Wednesday, November 28, 2012

Cinnamon Roll Pull Apart Bread


Since it's our first Thanksgiving and Christmas as our own little family, I really wanted to start some traditions. I am carrying on the new pjs on christmas eve tradition that my family always had, but I wanted more. I had found this recipe and marked it under 'Christmas Baking' so that I would easily remember it. When we trimmed our tree, I had this sitting out to snack on. Maybe thats why Adam didn't actually put any ornaments on? Im not sure, but I do know that I want this to become a yearly thing.

I would bake it a couple of minutes less than the suggested 25, but I like everything just slightly gooey. And it made a perfect breakfast for the next morning, too. Like I said before, back to healthy eating for me. I dont even want to imagine the calorie count in this loaf, which we ate in under 24 hours.

Cinnamon Roll Pull Apart Bread (from My Chocolate Therapy)
2 3/4 cups all purpose flour
2 tbsp cornstarch
3/4 tsp salt
2 1/4 tsp dried active yeast
1/4 cup sugar
1/3 cup milk
1/4 cup butter
1/4 cup water
2 eggs
1 tsp vanilla extract

For the filling
2/3 cup dark brown sugar
2 tbsp ground cinnamon
1 tsp cornstarch

1/4 cup butter, melted

For the Glaze
3/4 cup powdered sugar
1/2 tsp vanilla extract
hot water

In the bowl of a stand mixer with the paddle attached, place the cornstarch, sugar, yeast, salt and 2 cups of flour.

Heat the milk and butter together in a small saucepan until the butter is melted. Remove from the heat and add the water. Let this cool for about a minute, then add the vanilla, and pour all the liquid into the bowl with the flour. Stir this all together until all the dry ingredients are moistened.

Start the mixer on a low speed as you add the eggs one at a time until they're just incorporated. Stop the mixer and add 1/2 cup more flour to the bowl. Mix again at low speed for about half a minute. Add 2 more tbsp of flour and mix in on medium speed until you get a smooth, slightly sticky dough (about 45 seconds).

On a work surface sprinkled with 2 tbsp of flour, knead the dough until it's not sticky (about 1 minute). Place the dough in a large, oiled bowl and cover it with cling film. Leave the dough to rise in a warm place until it's doubled in size which should take about an hour.


While the dough rises, make the filling by combining the dark brown sugar, cinnamon and cornstarch in a small bowl.

Once the dough is ready, lightly flour your work surface and gently tip the dough onto it, sprinkling a little more flour on top of the dough. Roll the dough out into roughly a 40 x 40 cm square, then brush about 2/3 of the butter over the entire surface of the dough.

Sprinkle 3/4 of the filling mixture evenly on top of the butter on the dough, then roll the dough tightly into a log.

Place the log horizontally on your work surface. Take a piece of thread and place it vertically on your work surface. With the thread still vertical, place log on top of the middle of the thread. Move the thread to the left or right, so it is still under the dough, and is 1 cm in from the end of the log. Take the ends of the thread and hold them above the log. Cross them over each other once and pull them away from each other until the thread has cut through the dough completely.

On a piece of baking paper, use a rolling pin to flatten each slice to 3-4 mm thick (or just flatten in your hand like I did) Brush the top of each flattened slice with a little of the remaining melted butter, ans sprinkle on about 3/4 tsp of filling mixture. Place them on top of each other so you have 4-5 stacks each containing about 5 slices.

Grease a 9x5x3 inch loaf pan and preheat your oven to 350 degrees F. Place your stacks of dough into the greased loaf pan, cover loosely with clingfilm, and leave to rise in a warm place for about 30 minutes
Bake the bread for 25-35 minutes when it should be golden brown on top. (like I said, I baked for 25 minutes and it was slightly more cooked then I prefer). Let it cool in the pan on a wire rack for 15 minutes. Meanwhile make the glaze by stirring the vanilla then the hot water, a little at a time into the powdered sugar in a small bowl until you get a slightly runny icing.
Turn the loaf onto your plate and drizzle the icing overtop.
 

Wednesday, August 29, 2012

2 Ingredient Pumpkin Muffins


In 1 week we will all be ready for fall. Pools will be closed and the temps will slowly begin to subside across the country. By the end of September we should have average highs of only 79 here - so perfect! I made these muffins a month or so ago and have them stashed in my freezer. I needed a taste of fall and wanted to test out this extremely simple recipe.

There's only 40 calories in a mini muffin which won't break your calorie bank and these go great with a cup of joe - but don't think that this is a substitue for true pumpkin bread. It lacks some flavor and could use some pumpkin pie spice and ground cloves mixed in. But theres no need to really tweak this - make it when you're in a pinch but save your pumpkin bread recipe for when you need a true slice of pumpkin-y goodness!

2 Ingredient Pumpkin Muffins
1 box Spice Cake mix
1 15 oz can Pumpkin Puree

Mix both together and pour into muffin tins, large or small.

Bake for 15 minutes for minis and 25 for larger - I suggest checking them regularly though, so that you do not over bake.

Thursday, August 23, 2012

Top O the (Blueberry) Muffin to You!


It isn't very often that I bake something that Adam will eat. In fact, unless we have cookies (in the freezer) or cookie cake, he really doesn't eat baked goods. I found these muffin tops on pinterest and thought I'd bake them up since I've had 1 cup of blueberries in my freezer for a little while now, with no real vision for them.

I failed to get any kind of decent photo of these, and its a shame because they really are very tasty! Even Adam raved about them, twice. Which let me tell you, that doesn't happen often. They are perfect for company or to throw in the freezer, individually wrapped, for a snack or breakfast on the go. Personally, I would throw in more blueberries next time. I will also put in some of the juice to make them more blueberry throughout, like the original posters photos. Either way, it's Goodbye stumps and hello tops. Oh, and try to not think of the Seinfeld episode while you bake and eat these - I bet you can't do it!

Blueberry Muffin Tops (from Iowa Girl Eats)
2 cups flour
2 teaspoons baking powder
1/2 teaspoon salt
1/2 cup salted butter, softened
1 cup sugar
1 egg
1/3 cup milk
1 teaspoon almond extract (I used vanilla and everything was still a-ok)
2 teaspoon lemon zest, about 1 lemon
1 cup frozen blueberries, thawed and drained

Preheat oven to 375 degrees.

Combine flour, baking powder, and salt in a bowl, set aside.

 In the bowl of your mixer, cream together butter and sugar until well combined. Add in egg and beat until combined. Add milk, almond extract and lemon zest then beat until combined.

Slowly add dry ingredients into the wet ingredients, and mix until combined. Gently fold in blueberries. The dough will seem too thick, but just keep at it!

Refrigerate the dough for at least one hour, then shape into large balls.

Bake 6 to a baking sheet for 13-15 minutes, or until slightly golden brown on the bottom, and set on top.

Do not overbake, Let cool on the baking sheet for 5 minutes, then transfer to a cooling rack to cool all the way. If you don't plan to eat these all immediately, once they cool wrap each top in plastic wrap and then put them all into a gallon freezer ziploc and freeze.

Friday, March 16, 2012

Easy Popover Cinnamon Buns


I love using shortcuts for breakfast and Grands Biscuits really make things easy. These would be perfect to throw together for company, or just any day really. I didn't measure out any of the filling, but it's 2 easy ingredients to mix to taste.

If you like cinnabon icing, you will really enjoy this cream cheese icing recipe - so worth the calories that I'm sure are packed in! This whole package made baby and I very happy campers today.

Easy Popover Cinnamon Buns
1 can Grands Buttermilk Biscuits (8 biscuits to the can)
4 tbsp butter, melted
White Granulated Sugar
Ground Cinnamon

Preheat oven to 350 degrees. Spray 8 cups in a muffin tin with nonstick spray.

Mix together cinnamon and sugar to get desired taste.

Working with one biscuit at a time, flatten out into a square shape. Spoon melted butter on top and then sprinkle about 1 tbsp of cinnamon/sugar mix on top - the more the better for both!

Roll the biscuit and cut into thirds. Place all three pieces, cut side up, in a muffin cup. Repeat with remaining biscuits.

Bake for 14 minutes.


Make icing while baking and then top them off when warm.

Cream Cheese Cinnamon Bun Icing (from allrecipes)
2 ounces cream cheese, softened
7 tablespoons butter, softened
1/2 teaspoon vanilla extract
2 tablespoons milk
1 1/2 cups confectioners' sugar
1/4 teaspoon salt

Beat together the cream cheese and butter with an electric mixer in a large bowl until creamy. Mix in the vanilla and milk, then gradually mix in the confectioners' sugar and salt until smooth and fluffy.

Thursday, February 16, 2012

Brownie Batter Pancakes


I have definitely been on a breakfast kick lately. I made french toast the other night and then these pancakes. And you know, the cereal and cinnamon roll cravings are still present. This is a skinny recipe, taken from the best weight watchers/skinny blog out there - Skinnytaste. Definitely check it out from the link below. These pancakes are not overly chocolatey and the recipe makes just enough for one person. Kill your chocolate craving at your main meal! I found this best served with fresh fruit.

Brownie Batter Pancakes (from Skinnytaste)
1/4 cup all- purpose flour
1/4 tsp baking powder
1 tbsp Hershey’s Special Dark unsweetened cocoa powder (I used dutch cocoa which is why they are a few shades lighter in color)
1 tbsp + 1 tsp sugar (I used 1 packet of splenda)
pinch of salt (optional)
1 1/2 tbsp unsweetened applesauce
1 tsp pure vanilla extract
5 1/2 tbsp skim milk

Mix dry ingredients very well, then add wet. Make pancakes!

*130 Calories in this recipe

Tuesday, January 3, 2012

Quick Donuts


Now that the holidays are over, work has started and so has school. You're probably starting to run around like a crazy person again and looking for shortcuts to your meals, especially on the weekends with sports, errands and general hysteria. When your child has that sleepover that leaves you responsible for too many kids stomachs, or when you just want to be lazy (or if yo uare pregnant, or not!, and crave a quick sweet treat) just grab a few cans of grands biscuits and kick up your heels!

We actually used to make these when I was younger and pinterest reminded me of them. They are warm and soft and sugary - all things that are good! They also freeze pretty well if you put them in right after they have cooled.

Grands Biscuit Donuts
Grands Bisuits, as many cans as you'd like!
Cinnamon
Sugar
Vegetable Oil, for frying

Add about a 1/2 inch of oil to a deep frying pan and turn to medium low.

Using a bottle cap, or cocktail shaker top like me, punch a hole in the middle of each biscuit and separate the 2 parts.

Mix cinnamon and sugar together in a shallow bowl (add more sugar than cinnamon)

When the oil begins to bubble on the bottom, stick a dough ball in the oil - if it starts to sizzle then the oil is ready.

Place donuts and holes in the oil and fry for about a minute, then use a slatted spoon to flip and cook the other side. Take out of oil and place on a paper towel, then roll in the cinnamon/sugar mix. Bask in the warm deliciousness before they get cold and go on with the rest of your day :)

*it is best to do these in batches of 3 donuts at a time, so that when you take them out of the oil you can roll them in the sugar before they get too dry*

Wednesday, August 31, 2011

The Last Pumpkin Recipe You Need


Really. Do not go looking for another pumpkin bread recipe. You don't need it. I saw this Downeast Maine Pumpkin bread recipe last year but failed to ever make it. After Dunkin Donuts released their fall pumpkin flavors on Monday, I got back to perusing the web for something pumpkin-y to bake. I came back to this and since I had all of the ingredients, I went for it. I did make a few changes, which were noted in the comments section of this recipe, and those are reflected below.

This made one loaf, 12 muffins and one mini donuts pans worth of batter for me and I love the variety of items I have to chose from, I am taking most of the muffins into my new office (I like to win my coworkers over with treats) and froze the donuts. Ill freeze most of the bread as well after it cools and I slice it. I think you could up this a bit with a crumb topping - melted butter, cinnamon sugar and a bit of flour. Either way, its nice and firm but extremely moist and pumpkin-y. If you like the Starbucks pumpkin loaf, give this a whirl for some money saving during the fall months.

Pumpkin Bread (from allrecipes.com)
1, 15oz, can Pumpkin Puree
4 Eggs
1c Vegetable Oil
2/3c Water
2c White Sugar
1c Brown Sugar
3 1/2c Flour
2 tsp Baking Soda
1.4 tsp Salt
1 tsp Cinnamon
1 tsp Nutmeg
1/2 tsp Ginger
1/2 tsp Cloves
1/4 tsp Pumpkin Pie Spice

Preheat the oven to 350 degrees.

In a large bowl, combine ingredients from Pumpkin through Sugars and mix until combined.

In a separate bowl, mix remaining ingredients. In 3 batches, add the dry to the wet ingredients and mix until everything is combined.

Spray your pans or put liners in your muffin tins and aluminum foil in your loaf pan. Add batter to your pans and bake: 70 minutes for a loaf, 20 minutes for muffins and 12 minutes for mini donuts.

Monday, July 11, 2011

Chocolate Chip Challah Bread


Anything that has chocolate chips in it is ok by me, and I have always preferred my bread that way also. My mom and sister Meaghy have baked this before and it came out really great, so I decided to give it a shot. It was a very easy bread to make, and I halved the recipe so that I didn't have to fit too much into my freezer that is already overtaken by ice cream, cookies, muffins and meat!

The dense and chocolatey taste makes this perfect to eat plain for a snack or breakfast on the run. You could also easily make it for guests or brunch.

Chocolate Chip Challah Bread (from food network)
2 packets active dry yeast (4 1/2 teaspoons)
1/2 cup sugar, plus a pinch
7 cups bread flour, plus more for dusting
1 tablespoon salt
2 large eggs
1/2 cup vegetable oil, plus more for the bowl
1 cup semisweet chocolate chips (i used mini, regular and chunk chocolate chips)

Mix the yeast, a pinch of sugar and 1 cup warm water in a small bowl. Set aside while you measure out the other dry ingredients, or until frothy.

Whisk 3 1/2 cups flour, the remaining 1/2 cup sugar and the salt in a large bowl. Pour in the yeast mixture and stir with a wooden spoon.

Add 1 egg, the vegetable oil and 1 cup warm water; stir until combined. Gradually stir in the remaining 3 1/2 cups flour until the dough starts to come together.

Turn the dough out onto a floured surface and knead until smooth, about 8 minutes. Knead in the chocolate chips.

Transfer to a large oiled bowl, cover with plastic wrap and let rise in a warm place until doubled in size, 1 hour, 30 minutes.

Divide the dough into 3 equal portions. On a floured surface, roll each portion into a ball, then roll each ball into a 1 1/2-to-2-inch-wide strand, about 16 inches long. Lay the strands side by side on a sheet of parchment paper and pinch them together at one end.

Braid the 3 strands: Cross the right strand over the middle strand. Then cross the left strand over the middle strand. Repeat, crossing the right strand over the middle strand, then the left over the middle, until all of the dough is braided. Pinch the dough together at the end.

Slide the loaf (with the parchment paper) onto a baking sheet. Beat the remaining egg with 1 tablespoon water in a small bowl, then brush the egg wash all over the loaf. Bake until golden brown, about 30 minutes.

Sunday, July 3, 2011

Classic Waffles

I don't know about you, but one thing that I like to make sure of is that any guests are well fed. Food is a pretty important part of my daily life, so it's one thing I really like to focus on. We had a great dinner last night, and before my dad and Adam went golfing and my mom and I sat down for Casey Anthony's closing arguments, I wanted to make sure that we each had a full tummy. My sister Kelly got me a waffle maker for my bridal shower, so I put it to use for the first time this morning!

To make these patriotic you can use fresh blueberries or sliced strawberries in the batter, or put them on top with some whipped cream. I also used chocolate chips as a mix in.

Classic Waffles (adapted from AllRecipes) - made about 8 waffles
1 cup All Purpose Flour
1 cup Whole Wheat Flour
1 tsp salt
4 tsp Baking Soda
2 tbsp White Sugar
2 Eggs
1.5 cup Warm Milk
1/3 cup Butter, Melted
1 tsp Vanilla Extract
Mixins such as strawberries, blueberries, chocolate chips, etc.

Combine dry ingredients in a large bowl.

Combine all wet ingredients and fold into dry, stirring until well mixed.

If you want different mixins, just separate batter into different bowls and mix in your item.

Cook according to waffle maker instructions. You can freeze any leftovers and re-cook in the toaster oven.

Tuesday, May 10, 2011

Coffee's Perfect Match: Crumb Cake

I love sweet foods that compliment a nice hot cup of coffee. Something just feels right about eating a pastry, bread or cake in the morning and it being perfectly acceptable. When I ate this right out of the oven, I was worried that I had cooked it for too long, and I only put it in for the lower time. It wasn't until the cake cooled that I knew I had made the right choice chosing this recipe. It isn't dry, but itsn't overly moist. It goes great with your morning brew and has just a hint of sweetness from the crumb topping. This is great to have at a breakfast or brunch, or for the holidays. Also, I made this the night before and cut it then wrapped with plastic wrap and it stayed nicely even until 2 days later.

New York Style Crumb Cake (from Pineapple Grass, originally from Martha Stweart Living Magazine)
Makes one 13"x9" cake.
Serves 24+, depending on how you cut it.

For the crumb topping:
3-1/2 c. cake flour (not self-rising)
2/3 c. granulated sugar
2/3 c. packed dark-brown sugar
1-1/2 t. ground cinnamon
Coarse salt
2-1/2 sticks unsalted butter, melted


For the cake:
1-1/2 sticks unsalted butter, room temperature, plus more for pan
2-1/2 c. cake flour
1/2 t. baking soda
Coarse salt
1 c. granulated sugar
2 large eggs plus 2 large egg yolks
1 t. pure vanilla extract
2/3 c. low-fat buttermilk
Confectioners' sugar, for dusting

Preheat the oven to 325 degrees.
 
Make the crumb topping: Mix together flour, sugars, cinnamon, and 1/2 teaspoon salt in a medium bowl. Pour warm melted butter over mixture, and mix using your hands until medium to large clumps form.


Butter a 13"x9" baking pan. (I useda stick of butter at room temp - peeled a portion of the wrapper away and then rubbed the soft stick along the pan)

Whisk together flour, baking soda, and 1/2 teaspoon salt in a medium bowl.


Beat butter and granulated sugar with a mixer on medium speed until pale and fluffy, about 2 minutes. Beat in eggs and yolks, 1 at a time, then vanilla. Beat in flour mixture in 3 additions, alternating with buttermilk, beginning and ending with flour. Continue to beat until well combined.

Spoon batter into pan, and spread evenly using an offset spatula. Sprinkle crumb-topping mixture evenly over batter.


Bake until golden brown and a toothpick inserted into the center comes out clean, about 45-50 minutes. Transfer to a wire rack. Let cake cool slightly, about 15 minutes. Dust with confectioners' sugar. Serve warm or at room temperature. (I baked for 45 and wouldn't bake any longer than that.)

Wednesday, March 23, 2011

Chocolate Glaze for Donuts


(Do you ever wonder if you should write out 'donut' or 'doughnut'?)You probably remember when I first made donuts last year. I bought my mini donut pan and baked away, and even though I like a real fried donut, these were a great alternative! As I was thinking up a menu for my Bridesmaids Breakfast, I toyed with the idea of baking donuts, so I wanted to try a chocolate glaze. I came upon this recipe from Alton Brown, and I have to say that it is definitely a winner. It is thick, chocolatey and sweet. My only caution to you is the you need to work fast with it, as it harderns extremely quickly.

I actually realized later on in the day, when I opened the microwave, that I forgot to add butter to the donuts this time. I could tell that something was slightly different with the donuts themselves, but really it wasn't lacking as much as I would expect. After I glazed the donuts and let them sit, I threw most of them into the freezer on a plate until they were firm, then palced them in a ziplock to store in there. Now I can take out a mini chocolate donut one by one and not worry about over indulging! This would also be great on any type of sweet bread. (and I decided against baking them for the breakfast, since I already have enough on my plate to prep for it)

Chocolate Donut Glaze(from Alton Brown, Food Network)
1/2 cup unsalted butter
1/4 cup whole milk, warmed
1 tablespoon light corn syrup
2 teaspoons vanilla extract
4 ounces bittersweet chocolate, chopped
2 cups confectioners' sugar, sifted


Combine butter, milk, corn syrup, and vanilla in medium saucepan and heat over medium heat until butter is melted. Decrease the heat to low, add the chocolate, and whisk until melted.

Turn off heat, add the powdered sugar, and whisk until smooth. Place the mixture over a bowl of warm water and dip the doughnuts immediately. Allow glaze to set for 30 minutes before serving

Tuesday, January 18, 2011

Make Ahead Breakfast Sandwiches

Unless you work from home, chances are that you pass at least 3 fast food restaurant on your way to the office, and that you are close to suckered into their breakfast at least once a week. I pass Starbucks, Chickfila, McDonalds, Burger King, Dunkin Donuts, and a 24 hour Mexican place on my commute in, and some days it is hard to resist stopping.

Eating healthy doesn't mean that you have to give up eating a warm, yummy breakfast sandwich and it also doesn't mean you need to sacrifice your precious morning moments to cook one up. If you have 20 minutes on a Saturday or Sunday, you can easily make a batch of these sandwiches, stick them in the freezer and pull them out as you head out of the door on a busy morning. They are 185 calories and have all of your components: protein, fiber, carb and some dairy.

Breakfast Sandwiches
makes 5
5 Better Start, Thomas' English Muffins
10 Egg Whites
5 Slices Canadian Bacon
2.5 Slices Boar's Head Lacey Swiss Cheese
S&P

Use cooking spray to coat a small skillet. Crack 2 egg whites into the pan, as the pan heats use a soft spatula to form it into a circle. Add s&p, then flip egg. Do this 5 times and set each egg patty aside to cool as they are done.

Toast your english muffins in a toaster oven and take out to cool.

When your eggs are done, Place the canadian bacon into the skillet and heat for about a minute on each side. Let cool.

 Once everything has cooled off, assemble your sandwiches. Place them each in sandwich bags, then all of them in a larger freezer Ziploc. Take out and microwave for about a minute, then savor it as you prepare for your hectic day.


Wednesday, December 8, 2010

Mini Baked Vanilla Donuts with Vanilla Icing


I'm not sure that I have ever met someone who doesn't enjoy a donut. I could eat them everyday, as they are the perfect combination of moist dough and sweet icing. I always opt for the chocolate glazed with sprinkles, myself, but it is a rare occurrence that I buy one. I stumbled upon this baked mini donut recipe and was immediately intrigued. Baked donuts are always described as 'cake' donuts, but these do not taste like the cake donuts you buy at the donut shop. They are more moist and really tasty! I had to stop myself at gobbling them all up and limited myself to 2. I definitely recommend trying these. I bought the mini donut pan, which makes just the perfect size. These would be great for a kids party, when you have family staying over for the holidays, or when you need an interesting treat to bring along to an event. (Note that I got the donut and icing recipe from different sources.)

Mini Baked Vanilla Donuts (from The Life and Love of Grumpy's Honeybunch)
Makes slightly under 1 dozen minis
1-3/4 cups flour
1/2 teaspoon baking soda
1/4 teaspoon salt
1 tbsp. lemon juice
Skim Milk ( you need enough to make 1/2 cup after placing the lemon juice in measuring cup - or use 1/2 cup buttermilk)
1/3 cup packed dark brown sugar
1 egg
2 tbsp. unsalted butter, melted
1 tsp. vanilla extract

Heat oven to 325 degrees.  Coat donut pan with cooking spray.

In a large bowl, whisk flour, baking soda and salt together.  In a small bowl, whisk buttermilk, sugar, egg, melted butter and vanilla extract until smooth.

Add milk mixture to flour mixture and whisk until smooth.

Place batter in a piping bag (or you can use a sandwich bag with the tip cut).  Pipe batter into donut indents (about 2/3 full) and smooth tops. 
 
Bake at 325 for 10 minutes or until donuts spring back when lightly pressed. 

Cool in pan on rack, then turn out onto rack to cool. 

Vanilla Donut Glaze (from Sprinkle Bakes)
1 cup confectioner’ s sugar
1 tbsp. milk
½ tsp. vanilla extract
4 drops of liquid blue food coloring (you can use liquid or the wilton gel colors)
Choice of Sprinkles

In small bowl, stir together sugar, milk and vanilla extract until sugar is completely dissolved. Add food coloring and stir until color is uniform.  Use immediately to glaze doughnuts.  Dunk the top of the iced donut into a bowl of sprinkles (make sure the icing does not touch the bowl, just the sprinkles)

Monday, November 22, 2010

Bacon-Cheddar Grits

I have never been much into grits, because I really didn't grow up on them. I would have never tried them if Adam wasn't such a fan, either. Everytime we go out to breakfast he orders a side of them, and I was convinced that I did not like them at first. They did look sort of like a thicker cream of wheat though, which I did eat a lot as a kid. Eventually I tried a spoonful from his bowl and decided that I may like this! Especially with cheese.....mmmmm. So, when a recipe for Bacon and Cheese Grits popped up on Google Reader, I decided to bookmark it and save it for the perfect time. They are from the Pineapple Grass blog, which is a blogger I deeply relate with, food-wise. Some blogs I follow just for pretty pictures, but this blog actually offers me dishes that I want to make, and they always come out great.

5 months after bookmarking, I decided to make these grits for Adam's birthday weekend. They have bacon, cheddar and jalapenos so I really didn't think that much could go wrong with them, and I was right. Pineapple Grass hit a home run again! It was like a complete breakfast, rolled into one single bowl. I served it as a side with bagels and eggs, but it could definitely be a complete breakfast itself. This made a lot, so if you're making it for 2 you will definitely have leftovers, which is a really good thing because they were even better the next day, once the flavors were able to meld together and sit for a while.

Bacon-Cheddar Grits (from Pineapple Grass)
4 slices bacon, finely chopped (you could definitely up this to 6 slices)
1 jalapeno, finely chopped
4-1/2 c. water
1 c. quick-cooking grits
salt and pepper
1-1/2 c. grated sharp cheddar cheese (or a cheddar blend)

In a medium saucepan, cook bacon and jalapeno over medium heat, stirring occasionally, until bacon is browned, about 8 minutes. With a slotted spoon, transfer bacon and jalapeno to a small bowl. Remove pan from heat and carefully add 4-1/2 c. water.

Bring liquid to a boil over high heat and whisk in grits. Whisk until mixture begins to thicken, then reduce heat to low and gently simmer, stirring occasionally to prevent sticking, 25 minutes or until creamy. Season with coarse salt and ground pepper.

Whisk in 1 c. grated sharp cheddar cheese and 3/4 of the bacon mixture. Pour into a 2-quart serving dish and top with 1/2 c. cheddar and remaining bacon mixture

Cinnamon Rolls - Cinnabon CopyCats


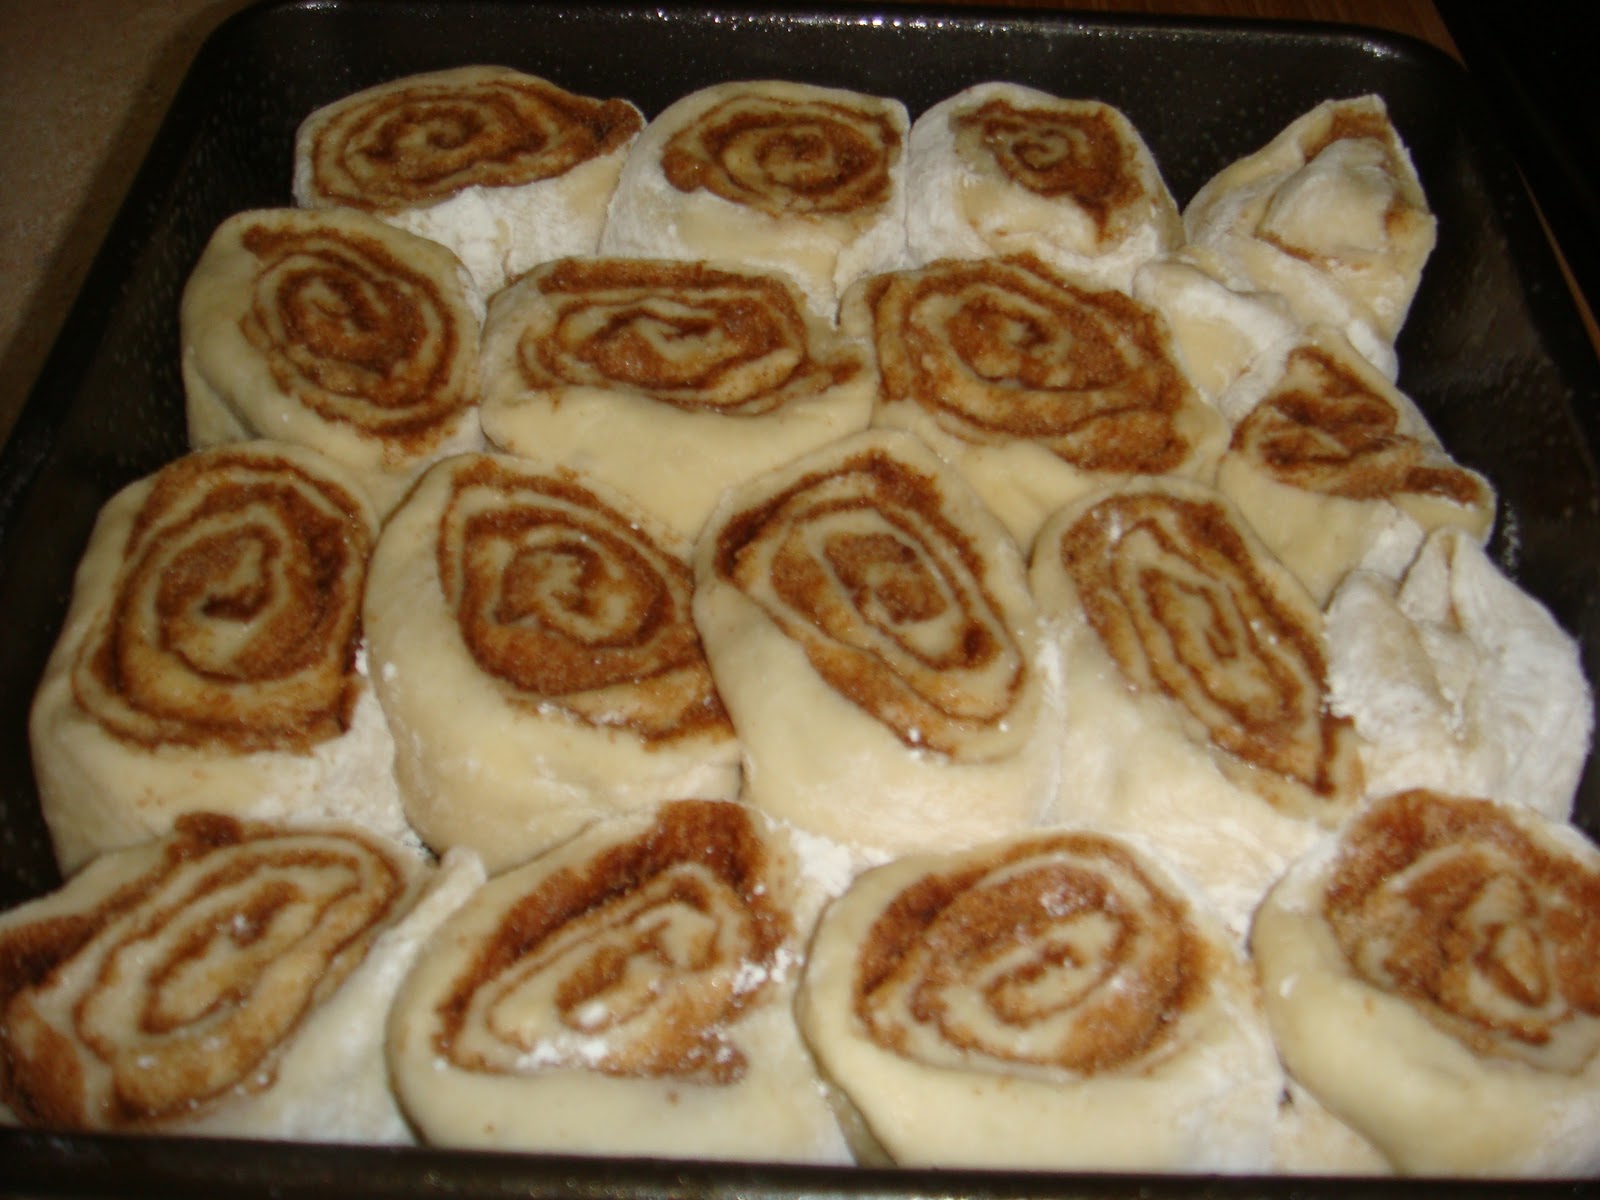
 I love any combination of sweet and breakfast foods, so I enjoy pastries, chocolate chip pancakes, syrup and Starbucks Christmas lattes. I also love cinnamon rolls, and no one makes them quite like Cinnabon. We used to share a large one between my sisters and mom when we would go to the mall, and I can taste the distinct gooey texture and soft icing when I think about it. I wanted to recreate these for breakfast this past Sunday, so I decided to go with a recipe that I found from food.com. It had 5 stars and 300+ reviews, so I thought I would give it a whirl.

When I mixed the dough ingredients, I found it extremely sticky. This sort of worried me, since the directions said to knead the dough into a ball with lightly floured hands. I needed A LOT of flour both on my hands and the counter. Other than that, these were very easy to make and came out SO GOOD. This is one of those things that you need to make. You will not regret it. I ate almost 3 for breakfast and another one for snack. The icing is absolutely to die for! I suggest putting them in a smaller, square pan so that the majority of them are soft on all sides. I liked how I squeezed them all in and then they puffed up all over each other. If you go this route I would also bake them for another 2 minutes or so.

Cinnabon CopyCats (from food.com)
1 (1/4 ounce) package dry yeast
1 cup warm milk
1/2 cup granulated sugar
1/3 cup unsalted butter, softened
1 tsp salt
2 eggs
4 cups flour

Filling
1 cup packed brown sugar
1 tbs cinnamon
1 1/2 tbs cinnamon sugar
1/3 cup margarine, softened


Icing
8 tbsp unsalted butter, softened
1 1/2 cups powdered sugar
1/4 cup + 1 tbsp cream cheese
1/2 tsp vanilla
1/8 tsp salt
Dough: Dissolve the yeast in the warm milk in a large bowl. Add sugar, margarine salt, eggs, and flour, mix well.

Knead the dough into a large ball, making sure to liberally flour your surface and hands. Put in a bowl, cover and let rise in a warm place about 1 hour or until the dough has doubled in size.

Roll the dough out onto a liberally floured surface, until it is approx 21 inches long by 16 inches wide.

Preheat oven to 400 degrees.

To make filling, combine the brown sugar and cinnamon in a bowl.
Spread the softened butter over the surface of the dough, then sprinkle the brown sugar and cinnamon evenly over the surface. (I microwaved my butter so that it was 80% melted and completely 'spreadable')

Working carefully, from the long edge, roll the dough down to the bottom edge.

Cut the dough into 1 3/4 inch slices, and place in a lightly greased baking pan.

Bake for 10 minutes or until light golden brown.

While the rolls are baking combine the icing ingredients and beat well with an electric mixer until fluffy. When the rolls are done, spread generously with icing. I suggest to let them cool for 5 minutes or so before digging them out of the pan. This way they will stay intact, instead of sticking together like mine did since I dug in right when they came out of the oven.

Sunday, October 3, 2010

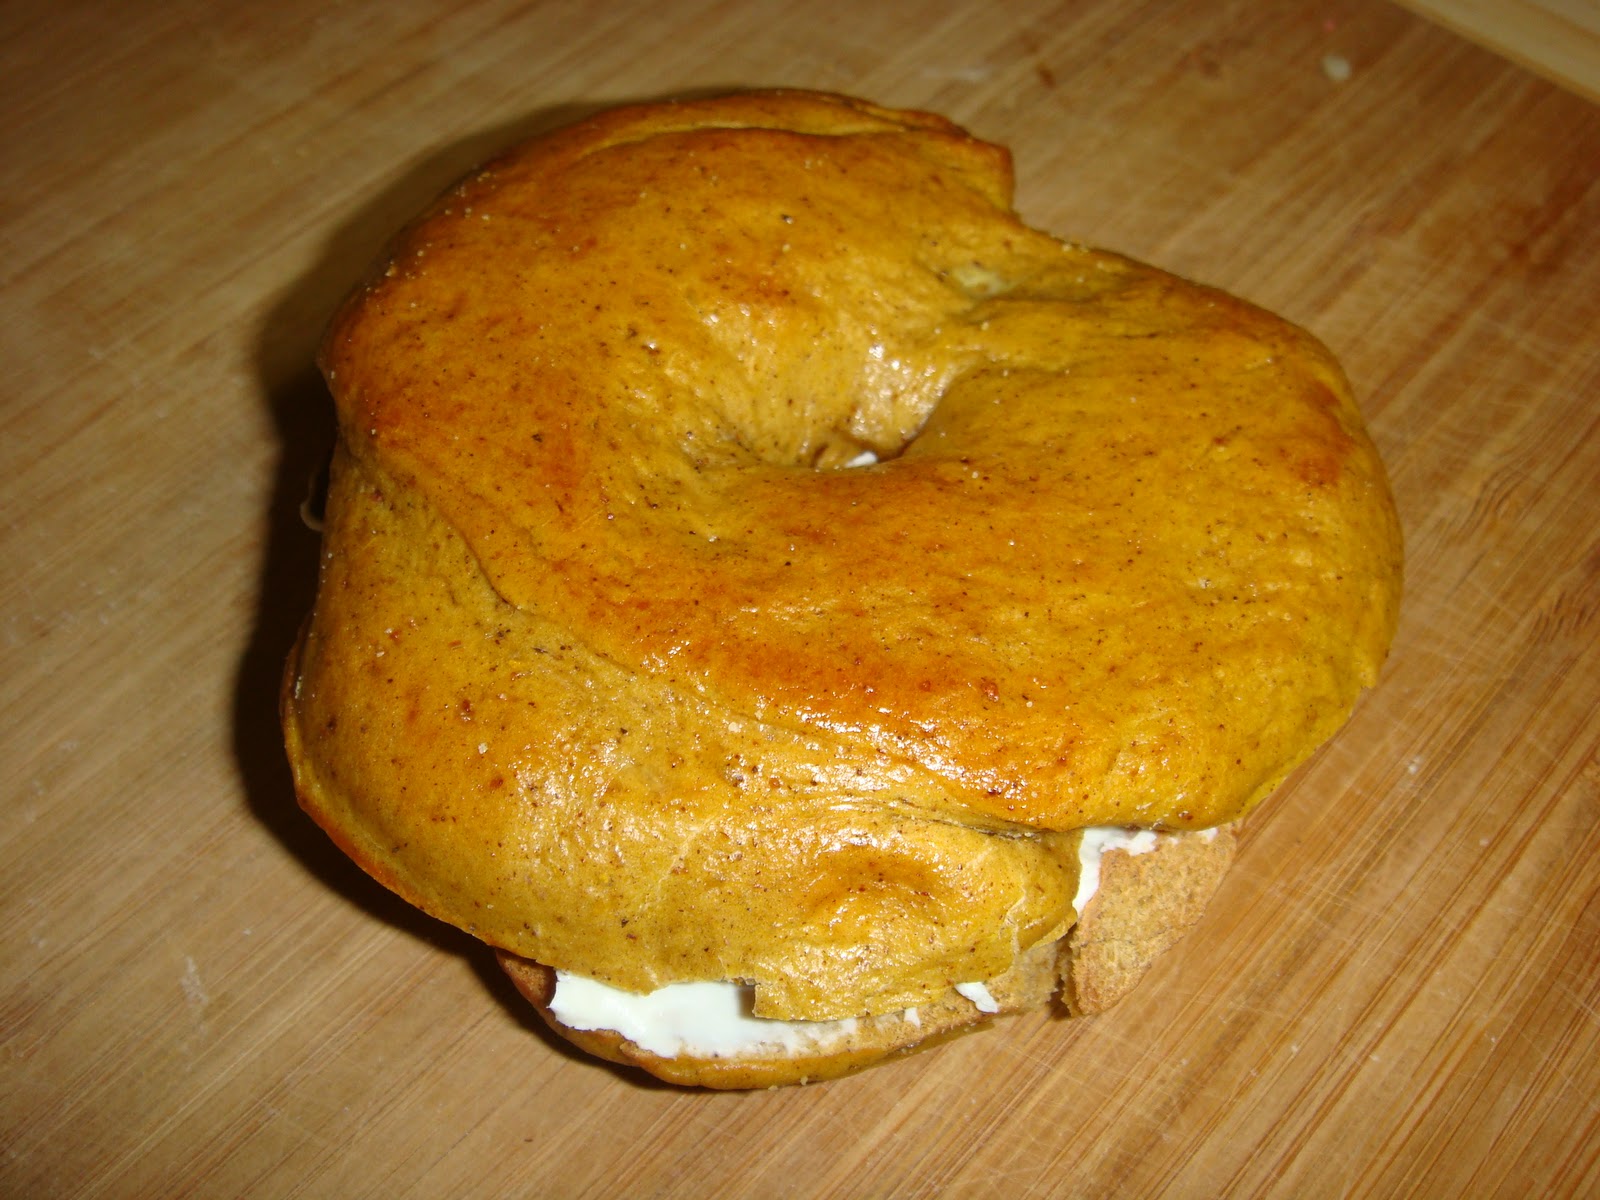
Pumpkin Bagels

I have always had the idea in my head that bagels are for more advanced bakers. I didn't even have the thought of attempting to bake them, until I saw this recipe on Pink Parsley it took less than 2 days and seemed incredibly easy. I was pretty positive that they would not come out even decent, but I decided that I wanted to try my hand at them anyway. To my surprise they were amazing! They are the consistency of every bagel I have ever bought and have a great pumpkin flavor that isn't too strong for non-pumpkin lovers. It's the time of year that I assume Adam hates as I always make pumpkin things and he hates pumpkin, but he even ate these. I suggest trying them today, you will not regret it! I threw a few in the freezer and cannot wait to enjoy them on the weekends.

Pumpkin Bagels (from Pink Parsley) these make 8
1/2 cup  (100-110 degrees)
3 1/4 tsp instant yeast
1/4 cup brown sugar
1 tsp salt
1/2 cup canned pumpkin
1 1/2 tsp ground cinnamon
1/4 tsp ground cloves
1 1/2 tsp nutmeg
3/4 tsp allspice
3 cups bread flour

To Cook:
3 quarts water
2 Tbs sugar
1egg, for egg wash

Combine all the ingredients for the dough, through allspice, in the bowl of a stand mixer fitted with a paddle attachment.  Mix to combine, then add the flour.  Mix on low speed to just combine, and switch to the dough hook.  Knead on medium speed for 12-15 minutes, then turn out onto a lightly floured surface and knead a few times.  Turn into a lightly-oiled bowl, cover with plastic wrap, and allow to rise for about an hour. 

Punch down the dough.  Divide into 8 equal parts, and roll into balls.  Use your thumb to form a hole in the center, then stretch smooth the dough to form an even shape.  Place on a baking sheet and continue with the remaining dough.  Cover the baking sheet with a clean kitchen towel, and allow to rise until puffed, about 45 minutes.

In a large saucepan, bring the water and 1 Tablespoon of sugar to boil.  Preheat the oven to 400 degrees.  Sprinkle a baking sheet with cornmeal.  Whisk together 1 egg plus 1 teaspoon of water or milk in a small bowl.

Working a few bagels at a time, boil the bagels 1-2 minutes per side.  Remove from the water and place on a rack to dry for about 1 minute, and repeat with remaining bagels.

Transfer the bagels to the prepared baking sheet, then brush with egg wash. 

Bake 15 minutes, or until bagels are golden-brown

Pumpkin Biscotti

 It is no secret that I love all things pumpkin. I know that you can make pumpkin foods all year round, but I prefer to save it for the fall months as it brings back good memories. Last year I made candy cane biscotti and loved them, so this year I opted for some pumpkin biscotti that I found over on The Way the Cookie Crumbles. I decided to dip mine in semi sweet chocolate and cover with Halloween Sprinkles, and I am so glad that I did. I think that without the chocolate I would not enjoy these as much, I think that they need a little more of a pumpkin flavor. However, with the chocolate they are perfectly delicious!

Pumpkin Biscotti (from The Way the Cookie Crumbles)
2½ cups (12 ounces) all-purpose flour
1 cup (7 ounces) granulated sugar
1 teaspoon baking powder
1 teaspoon cinnamon
½ teaspoon nutmeg
pinch ginger
pinch cloves
½ teaspoon salt
2 eggs
6 tablespoons butter, melted
½ cup pumpkin purée
1 teaspoon vanilla extract
 Semisweet Chocolate Chips/Wafers
Sprinkles


1. Preheat oven to 350°F. Sift together the flour, salt, sugar, baking powder, and spices into a large bowl.

2. In another bowl, whisk together the eggs, melted butter, pumpkin purée, and vanilla extract. Pour the pumpkin mixture into the flour mixture. Give it a rough stir to generally incorporate the ingredients, the dough will be crumbly.

3. Flour your hands and a clean kitchen surface and lightly knead the dough. Lightly grease a baking sheet or line it with parchment paper. Form the dough into a large log, roughly about 15-20 inches by 6-7 inches. The loaves should be relatively flat, only about ½ inch high. Bake for 22-30 minutes at 350ºF, until the center is firm to the touch. (Feel free to also form two smaller logs for cute two-bite biscotti; just cut the baking time to 18-24 minutes.)

4. Let biscotti cool for 15 minutes and then using a serrated knife cut into 1 inch wide pieces. Turn the oven to 300ºF and bake for an additional 15-20 minutes. Cool completely.

Melt chocolate wafers or chips in a double boiler and dip the bottoms in melted chocolate. Dip into a generous bowl of sprinkles and place on parchment paper to dry. To add chocolate swirls to top, place melted chocolate in a ziplock bag and cut off a corer, squeeze onto biscotti.