Showing posts with label Snack. Show all posts
Thursday, January 31, 2013
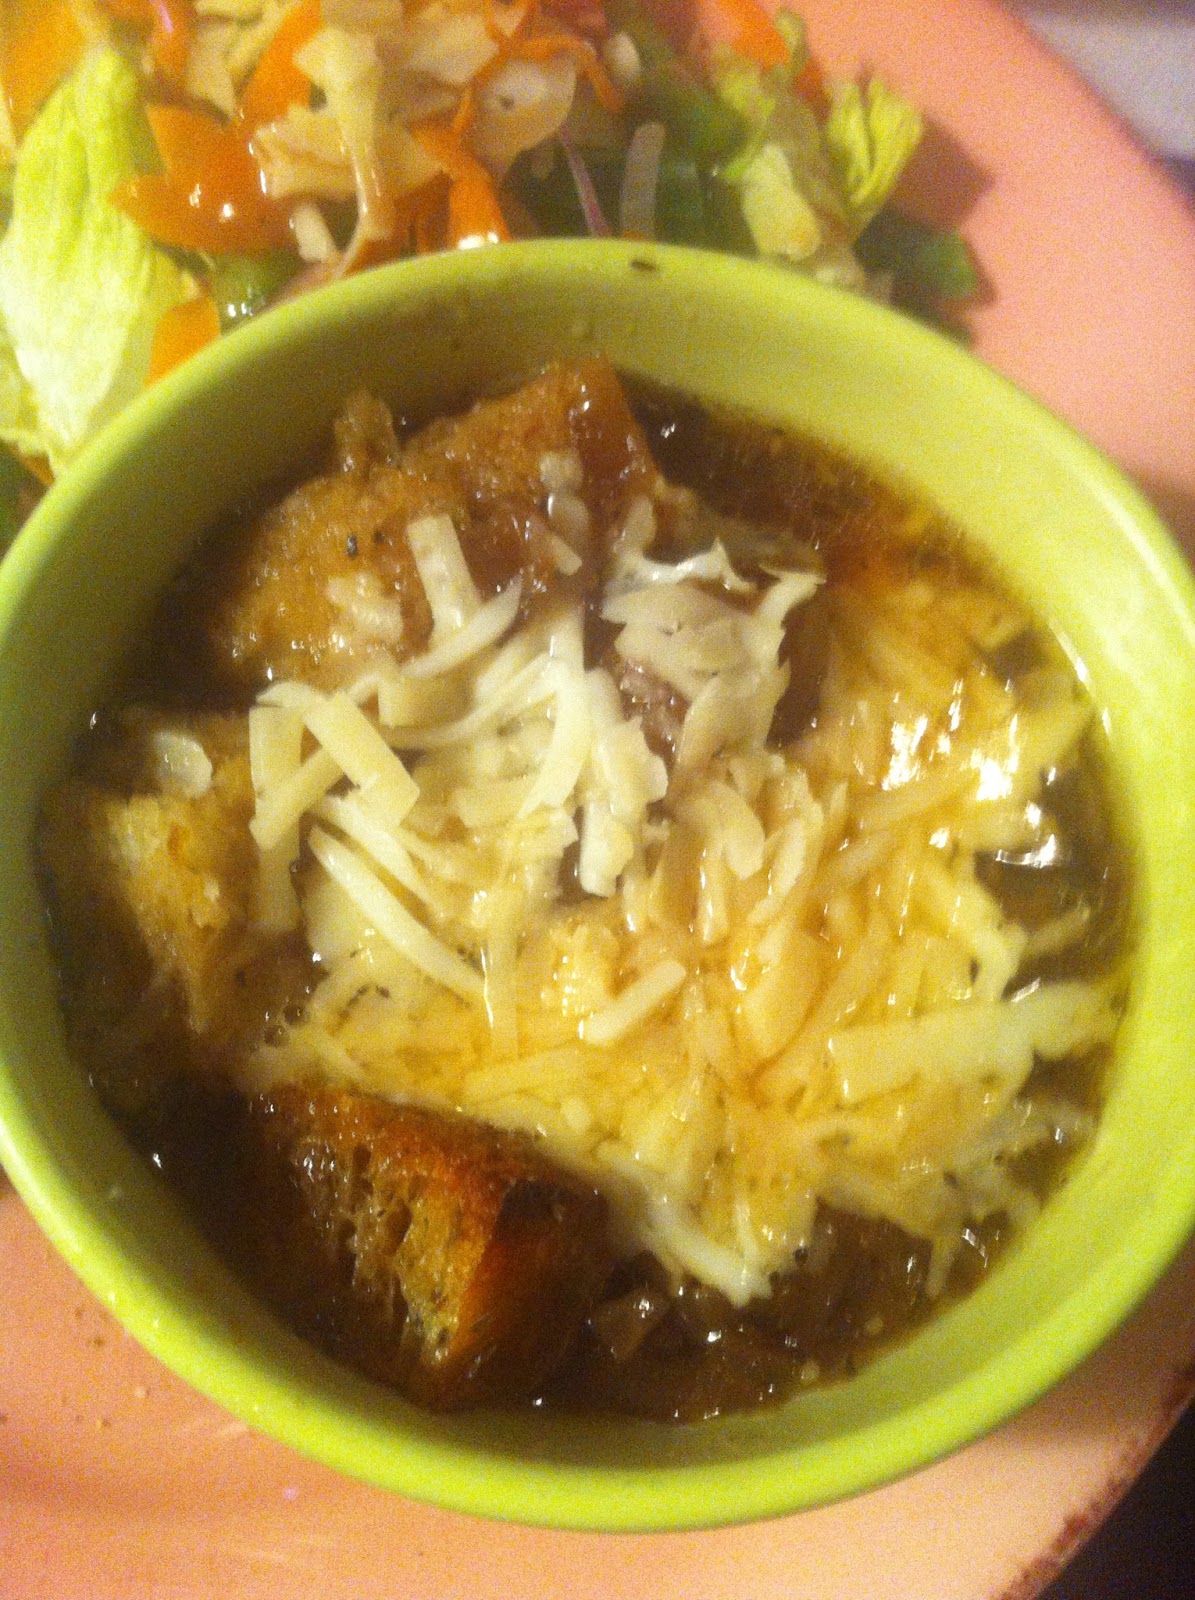
Crock Pot French Onion Soup
We are still in the season of soups. January is, I think, the coldest month most places so I know that a lot of you are still dreading going outside. You're bundling up and enjoying time on the couch, by the fire, drinking tea or coffee or hot chocolate. Well, I am anyway and I'm not really North!
I found this recipe on Pinterest way back and finally gave it a try. It is the best crock pot meal that I've ever tasted. The work of caramelizing the onions before hand really pays off with the flavor. I went the route of making croutons and I didnt broil with the cheese. You'll see the way I did it below but feel free to go to the original source and see what they did. Either way you finish it off, the flavor of this soup is the same as restaurant quality - I promise!
French Onion Soup (adapted from All Recipes)
6 tablespoons butter
4 large yellow onions, sliced and separated into rings
1 tablespoon white sugar
2 cloves garlic, minced
1/2 cup cooking sherry
7 cups reduced-sodium beef broth
1 teaspoon sea salt, or to taste
1/4 teaspoon dried thyme
1 bay leaf
French Bread, cubed
Olive Oil
Onion Powder, Garlic salt, Garlic Powder, Oregano, Basil (or any seasonings you want/have)
1/2 cup shredded Swiss cheese
1/3 cup shredded Asiago cheese
1/4 cup freshly shredded Parmesan cheese
2 tablespoons shredded mozzarella cheese
Heat butter in a large, heavy pot over medium-high heat; cook and stir onions until they become translucent, about 10 minutes. Sprinkle onions with sugar; reduce heat to medium. Cook, stirring constantly, until onions are soft and browned, at least 30 minutes. Stir in garlic and cook until fragrant, about 1 minute.
Stir sherry into onion mixture and scrape bottom of pot to dissolve small bits of browned food from the pot. Transfer onions into a slow cooker and pour in beef broth. Season to taste with sea salt; stir in thyme and bay leaf. Cover cooker, set on High, and cook 4 to 6 hours. If desired, set on Low and cook 8 to 10 hours.
At any point you can make your croutons. Simply toss the bread in a large bowl with olive oil. then add your seasonings and toss again, to coat each piece. Spread on a baking sheet and bake at 375 for 4 minutes or so, turning half way through.
When soup is done, ladle into bowls, then add croutons and sprinkle your cheese mixture on top. Let sit for a minute or 2 so that the cheese can melt from the heat of your soup.
Monday, January 28, 2013
BBQ Chicken Cauliflower Pizza
I sliced my pizzas into 4 rectangles each, so I think this could be a really nice appetizer or party food. You could top them all differently or all the same and it would be so easy to throw together.
BBQ Chicken Cauliflower Pizza
Cauliflower Crust
2 BBQ Chicken Breasts - see below
2 Tbsp BBQ Sauce
Mozzarella Cheese
Basil
1/2 Green Pepper, sliced thin
1/4 Red onion, sliced thin
Salt
Pepper
Garlic Powder
Preheat oven to 450 degrees (it should already be set from your crust)
Sprinkle Salt and pepper onto the baked crust. Then place a small amount of mozzarella on the crust (just enough to hold everything in place)
Top with Basil, Chicken, Onion and Pepper and put some BBQ sauce on as well (about 1 tbsp per pizza if you're making 2). Then top with more cheese and a dash of garlic powder.
Bake about 10 minutes, or until cheese is melted.
Soft Pretzels
I don't think that I know anyone who doesn't like a soft pretzel. They're warm, soft, sweet and salty and you dip them into condiments. Like cheese and mustard. Yum.
They are also surprisingly easy to make! I usually make bite sized ones but I tried a new recipe and made regular ole pretzels this time. They were a hit and I will continue to make these. You can easily make these bite sized nuggets instead of full sized as well.
I also think it would be interesting to change up the toppings. How about a sesame or poppy seed pretzel? everything? cinnamon/sugar?? Go Crazy!
Soft Pretzels (from Alton Brown)
1 1/2 cups warm (110 to 115 degrees F) water
1 tablespoon sugar
2 teaspoons kosher salt
1 package active dry yeast
22 ounces all-purpose flour, approximately 4 1/2 cups
2 ounces unsalted butter, melted
Vegetable oil, for pan
10 cups water
2/3 cup baking soda
1 large egg yolk beaten with 1 tablespoon water
Pretzel salt
Combine the water, sugar and kosher salt in the bowl of a stand mixer and sprinkle the yeast on top. Allow to sit for 5 minutes or until the mixture begins to foam. Add the flour and butter and, using the dough hook attachment, mix on low speed until well combined. Change to medium speed and knead until the dough is smooth and pulls away from the side of the bowl, approximately 4 to 5 minutes. Remove the dough from the bowl, clean the bowl and then oil it well with vegetable oil. Return the dough to the bowl, cover with plastic wrap and sit in a warm place for approximately 50 to 55 minutes or until the dough has doubled in size.
Preheat the oven to 450 degrees F. Line 2 half-sheet pans with parchment paper and lightly brush with the vegetable oil. Set aside
Bring the 10 cups of water and the baking soda to a rolling boil in an 8-quart saucepan or roasting pan.
In the meantime, turn the dough out onto a slightly oiled work surface and divide into 8 equal pieces. Roll out each piece of dough into a 24-inch rope. Make a U-shape with the rope, holding the ends of the rope, cross them over each other and press onto the bottom of the U in order to form the shape of a pretzel. Place onto the parchment-lined half sheet pan.
Place the pretzels into the boiling water, 1 by 1, for 30 seconds. Remove them from the water using a large flat spatula. Return to the half sheet pan, brush the top of each pretzel with the beaten egg yolk and water mixture and sprinkle with the pretzel salt. Bake until dark golden brown in color, approximately 12 to 14 minutes. Transfer to a cooling rack for at least 5 minutes before serving.
Thursday, January 24, 2013
No Mess Party S'mores
I loooove smores! I always have marshmallows in the house, and I make them in the microwave. The problem is the marshmallow puffs so much and makes a huge mess. Lets face it - mess is just a part of the s'mores eating experience, but it doesn't have to be!
With the whole invention of fluff, and now the Jet Puffed version, we can premake our s'mores and eat them without having a white, sticky face! Hooray!
I admit that I liked these best once they had hardened up. I made them in the morning and left them out for a few hours, then put them in a tupperware container and by night they were all set up. Gooey but firm - yum! I enjoyed these for the next week or so. I'm not sure why but I tend to like things like candy a little stale and on the firm side, and that carried over into my s'mores. If you want them ooey gooey then eat them a couple hours after making, once the chocolate hardens.
No Mess Party S'mores
Graham crackers
Marshamallow Fluff (or Jet Puffed Marshmallow, which is what I used)
Semi Sweet or Milk Chocolate to melt (I just used chips)
Sprinkles
Using a double boiler, place your chocolate in the top dish and melt on low heat.
Meanwhile, break your graham crackers and place fluff between 2 crackers.
Once your chocolate is smooth and melted, dip your assembled crackers in and lay on wax paper. Shake your sprinkles on and allow the chocolate to cool and harden.
Saturday, December 1, 2012
White Chocolate Cranberry Cookies
I wonder when cookies became a Holiday staple? I mean, if you are looking to bake something from Thanksgiving-New Years it is probably one of the first things that you think of. Especially when you have a cookie exchange, company or need a personal gift - you look for something new with a little kick.
Enter these babies. They pretty much scream Holiday Time. I love how the cornstarch makes them thick and soft and the cranberries add a perfect twist to the sweetness. Usually I'm not really a white chocolate chip kind of girl, but this cookie is an exception.
I love cookies for the reason that you can bake them, freeze and when you pull them out they are just as perfect as when they go in. If you're having a party it makes it so easy to have your dessert taken care of early. Or if you're making them as gifts you can do it ahead of time so that you arent in such a rush the night before you see the person.
I currently have a freezer full of 3 types of cookies (about 2.5 dozen or so of each) plus an entire gallon bag of Buckeye bark. Um yea, I think I'm on cookie overload, but this is the one time of year where I feel that is perfectly acceptable :) So even if you have no real excuse to bake more cookies, just throw them in the freezer once they are cooled and you can enjoy them yourself for weeks to come. Happy baking!
White Chocolate Cranberry Cookies (from Sallys Baking Addiction)
3/4 cup (1.5 sticks) unsalted butter, softened to room temperature
3/4 cup dark brown sugar
1/4 cup granulated sugar
1 large egg, at room temperature
2 teaspoons vanilla extract
2 cups all-purpose flour
2 teaspoons cornstarch
1 teaspoon baking soda
1/2 teaspoon salt
3/4 cup white chocolate chips
3/4 cup dried cranberries
In a large bowl using a hand-held mixer or stand mixer with paddle attachment, cream the butter and sugars together on medium speed until fluffy and light in color.
Mix in egg and vanilla.
On low speed, mix in flour, cornstarch, baking soda and salt. Stir in white chocolate chips & dried cranberries. Chill dough (covered) for 30 minutes or up to 3 days. (I left mine in the fridge for a couple of hours and it was perfectly firm when I scooped it up)
Preheat oven to 350F.
Drop balls of dough (1.5 tablespoons each) onto cookie sheet OR used a standard-sized cookie scoop.
Bake for 8-9 minutes, until barely golden brown around the edges. Do NOT cook them longer than 9 minutes.
Remove and let cool for 5-10 minutes on the cookie sheet. Transfer to cooling rack.
Wednesday, November 14, 2012
Skinny Tuna Melt
Let's just keep rolling with the 'healthy' foods, shall we?
Adam loves tuna. Tuna sandwiches, tuna subs, tuna melts. So do I, but the combo of mayo and bread usually does it in for my calories. When I have this problem it can usually be solved by visiting the SkinnyTaste blog! She has so many light recipes that it is truly amazing. I didn't use her recipe but just her idea of making an open face sandwich that's 2 servings. Maybe I'm just a dumby for not thinking that up on my own though!
This came up on pinterest and even though it may not be filling enough for Adam, it works for me. Paired with some veggies or chips or pretzels. I get to have my tuna, bread and cheese without the guilt.
Skinny Tuna Melt - makes 2 servings
1 can tuna (in water), drained
1 piece of celery, diced
1 tbsp red onion, sliced thin and chopped
1 tbsp light mayonnaise
salt and pepper
2 slices bread (I use healthystyle, 35 calorie bread)
2 slices cheddar cheese
4 slices tomato
Mix the first 5 ingredients together in a small bowl.
Layer cheese, tuna mix and tomato on each piece of bread.
Bake in your toaster oven until the cheese is melty.
Monday, November 12, 2012
Biggest Loser Sweet Potato Skins
Fall Sundays = Football. Football = Snacks. Snacks =
I love to snack. I love to pick out what Im going to make, prep it, whip it up and sit back and enjoy it. Any time of sport is the perfect excuse for eating snacks. All day. I dont care what sport it is, just let me eat while I watch and it'll all be ok. Of course, if you care at all about what you're putting into your body then you probably have a guilty feeling after the day is over and you go to tally your calories.
So, I've turned to pinterest for my spruced up versions of typical snacks. For example - potato skins. You love them loaded with gooey, stringy cheese and bacon, sour cream and chives. I promise you that this skinny version tastes just as fantastic. The spices give it a kick and a flavor that just mixes really well with the sweetness of the potato. Try this and I promise it won't disappoint. It would even be perfect for your holiday party since it's in and out of the oven then onto the table.
Biggest Loser Sweet Potato Skins (slightly adapted from prevention.com)
16 ounces, 1/2"-thick sweet potatoes (I have no clue how many ounces I used but I did about 2 medium sized potatoes)
1 teaspoon olive oil
1/8 teaspoon sea salt
1/8 teaspoon garlic powder
1/8 teaspoon cayenne, or to taste
2 ounces shredded low-fat Cheddar cheese
3 strips Turkey Bacon, cooked and crumbled
2 tbs finely chopped scallions (i personally don't think you can ever have enough green onion so I load it on)
2 tablespoons Fat Free Sour Cream
Preheat the oven to 450°F. Line a baking sheet with foil.
In a large bowl, toss the potatoes and oil together until the potatoes are well coated.
Place the potato rounds in a single layer on the prepared pan so they do not touch. Sprinkle the salt, garlic powder, and cayenne evenly over the top of the potatoes. Bake them for 10 minutes. Flip them and bake for 7 to 9 minutes longer, or until they are tender inside and starting to brown lightly on the outside.
Push the potato rounds together so that they touch and you can easily top them in a single, even layer. First place the Cheddar, then the bacon, and then the scallions over the rounds. Bake for 2 to 3 minutes, or until the cheese is melted.
Serve immediately with sour cream.
Wednesday, August 29, 2012
2 Ingredient Pumpkin Muffins
In 1 week we will all be ready for fall. Pools will be closed and the temps will slowly begin to subside across the country. By the end of September we should have average highs of only 79 here - so perfect! I made these muffins a month or so ago and have them stashed in my freezer. I needed a taste of fall and wanted to test out this extremely simple recipe.
There's only 40 calories in a mini muffin which won't break your calorie bank and these go great with a cup of joe - but don't think that this is a substitue for true pumpkin bread. It lacks some flavor and could use some pumpkin pie spice and ground cloves mixed in. But theres no need to really tweak this - make it when you're in a pinch but save your pumpkin bread recipe for when you need a true slice of pumpkin-y goodness!
2 Ingredient Pumpkin Muffins
1 box Spice Cake mix
1 15 oz can Pumpkin Puree
Mix both together and pour into muffin tins, large or small.
Bake for 15 minutes for minis and 25 for larger - I suggest checking them regularly though, so that you do not over bake.
Thursday, July 26, 2012
Peanut Butter Cups
My motto is that every diet deserves a treat. I never fully cut out sweets because it is just impossible for me and I would end up going on a 3 day chocolate binge a couple of days in.
Especially with having to tote little Remy around now I try to make things that I already have the ingredients for. So, I scraped all around our pb jar and added a chopped milk chocolate square to the chocolate bowl. Everything came together so fast and easy, and I got 24 mini muffin tin pb cups out of this recipe. I am storing 6 in the fridge and the rest are in the freezer.
These really do taste like the real deal. They are addicting, delicious, melt-in-your-mouth yummy. They would be perfect for a party, or as a small treat for you of course! I never thought that there would be a good homemade peanut butter cup recipe, but this is it. So go ahead, make these and enjoy :)
Peanut Butter Cups (from Blue Eyed Bakers)
1/4 cup butter, cut into cubes
3/4 cup peanut butter
3/4 cup graham cracker crumbs, about 4 whole crackers
1/4 cup sugar
1 cup semisweet or milk chocolate chips
1/4 cup milk
Line a muffin tin (large or mini) with paper liners.
In a microwave safe bowl, melt the butter & peanut butter together for 45 seconds. Stir until smooth. Add graham cracker crumbs and sugar and mix to combine. Distribute mixture evenly between the prepared muffin cups. Refrigerate for 15 minutes to set peanut butter layer.
After the peanut butter has chilled, combine chocolate and milk in a microwave safe bowl and heat in 25 second intervals until chocolate is just melted. Stir until smooth. Distribute chocolate evenly over the top of the peanut butter layer. Chill until firm, at least 30 minutes. Store in the fridge. or just devour!
Thursday, May 3, 2012
Paper Chocolate Chip Cookies
There are so many recipes out there for chewy, thick chocolate chip cookies. I admit that I love this kind of cookie, especially gooey in the middle, but sometimes I want to mix it up. When I saw these thin chocolate chip cookies on Pinterest, I pinned and decided to make them to store in the freezer. My mom is one who likes really crisp cookies, so this recipe reminds me of her. They are paper thin but the centers remain chewy, with a crisp outside. You get the best of both cookie worlds and I honestly have eaten way too many of these in the past few days.
These do take a while to make as you need to leave plenty of room for the cookies to spread on your baking sheet, so you will do plenty of batches. I also suggest not using the parchment paper and just opting to drop the dough onto the baking sheet itself. I ended up freezing some of the dough in balls to bake later because I was tired of standing for 2 hours, and I had already baked plenty! Just ignore how much butter is in these when you indulge, since the recipe makes so many there isnt too much butter in each (at least thats what Ive been telling myself).
Paper Chocolate Chip Cookies (from Martha Stewart)
3 1/2 cups all-purpose flour
1 1/2 teaspoons table salt
2 teaspoons baking soda
1 pound (4 sticks) unsalted butter, room temperature
3 cups packed light-brown sugar
1 cup granulated sugar
4 large eggs
2 teaspoons pure vanilla extract
1 1/2 cups semisweet chocolate chips (or 2 cups like I did)
Preheat oven to 375 degrees. Line two baking sheets with parchment paper, and set aside. In a large bowl, sift together the flour, salt, and baking soda; set aside. In the bowl of an electric mixer fitted with the paddle attachment, beat the butter on medium speed until smooth. Add the sugars, and beat until combined and fluffy. Beat in the eggs and vanilla until well blended.
Add flour mixture, and beat on low speed until combined. Add the chocolate chips, and beat until combined.
Drop 2 to 3 tablespoons of batter at a time onto baking sheets (a cookie scoop is ideal for this batter), about 2 inches apart. Bake until golden brown, about 8 minutes, rotating halfway through. Remove the cookies and the parchment paper from the baking sheets, and let cool on a rack. (like I said, I found putting the dough directly on the sheets worked much better than the parchment paper, but feel free to experiment)
*Store in an airtight container or place directly in the freezer.
Friday, April 13, 2012
Freezer Smoothie Packs
Well, here is another idea from pinterest! I am trying to come up with quick, healthy foods for me to eat and freezer bag smoothies is so obvious yet nothing I thought of doing until it was placed in front of my eyes. You can buy any fruits and just portion them into baggies then add milk! I actually decided to go with light soy vanilla milk because I heard that it has a creamier consistency. And since a carton of that is good for much longer than regular old milk, you don't have to worry about making these all at once.
I made 8 packs using 30 oz frozen strawberries, 12 oz frozen raspberries and 4 bananas. It equaled out to about 1/4 cup raspberries, 7 strawberries and 1/2 banana per baggie. I added about 1 cup milk and blended until smooth.
I also bought frozen, shredded coconut to add in when I feel like it. These are fun because you can do so many different combos and they are so easy to throw together.
Wednesday, February 29, 2012
PB & White Chocolate Chex Mix
If you're looking for something that is poppable and addicting, then you've come to the right post. Something that I love about this, besides how incredibly easy it is to make, is that you can custom fit it to any holiday with your sprinkles. Christmas, Valentines, St Pattys, Easter, 4th of July, Halloween, you name it! The most difficult part is waiting for everything to cool off as the aroma of chocolate and peanut butter overtakes your kitchen.
I admit that I like things sweet, so I used more confectioners sugar than the original recipe and I covered about 70% of my cereal mix in it and then 30% with sprinkles. You can add in any other things you want, too. I think that I would add raisins next time, and maybe some almonds.
PB & White Chocolate Chex Mix (from Apple a Day)
I admit that I like things sweet, so I used more confectioners sugar than the original recipe and I covered about 70% of my cereal mix in it and then 30% with sprinkles. You can add in any other things you want, too. I think that I would add raisins next time, and maybe some almonds.
PB & White Chocolate Chex Mix (from Apple a Day)
7 c. Rice Chex cereal
2 c. mini pretzels
2 c. mini pretzels
1 c. white chocolate chips
1/2 c. smooth peanut butter
1/4 c. butter
1 c. confectioners' sugar
1/4 c. Sprinkles (any shape or variety, optional)
Place cereal and pretzels in a very large bowl. In a spearate, small microwavable bowl, microwave baking chips, peanut butter and butter, uncovered, on high for 1 minute. Stir, then continue heating in 30 second intervals, stopping each time to stir, until mixture is completely melted and smooth.
Pour peanut butter mixture over cereal, stirring until evenly coated.
Place 1/2 of the cereal mixture in 1-gallon plastic bag. Add powdered sugar, seal, and shake until well coated. Spread on wax paper and sprinkle additional sugar on top, so that they are coated with white, sugary goodness. Let cool, 15-20 minutes.
Meanwhile, stir sprinkles into remaining cereal mixture. Spread on wax paper to cool, 15-20 minutes.
In serving bowl, mix both cereal mixtures. Store in airtight container or divide among individual baggies and tie with festive ribbon.Wednesday, February 8, 2012
Soft Pretzel Bites
Soft pretzels remind me of attending baseball games, basketball games and fairs. I love a good soft pretzel - the warm doughy inside combined with a crusty, salty outside is just divine in my book. Sure, you can pop a Pretzel Time pretzel in your microwave for 45 seconds, but it just isn't the same as one of those big, warm ones that you buy out.
I haven't actually made my own pretzels before now, but I knew that it was about time I made a pass at it. And what better time than superbowl, really? You probably have all of the ingredients in your home and it's perfect for game days, parties, guests, or just a special snack. These were really easy and good - we ate so many that we couldn't fit our main course in. I also had success putting the leftovers in the freezer, just pop them in the microwave for 20 seconds or so and you can re-live the experience again :)
Soft Pretzel Bites (from Beantown Baker, originally from Bobby Flay)
1 1/2 cup warm water
2 Tbsp brown sugar
1pkg active dry yeast
6 Tbsp butter, melted
2 1/2 tsp salt
4 1/2 – 5 cups flour
2 quarts water
1/4 cup baking soda
1 egg, beaten plus 1 tbsp water
course sea salt for topping
In the bowl of a stand mixer fitted with the paddle attachment or dough hook, combine brown sugar, yeast, melted butter and water. Give a quick mix, then let sit for 5 minutes or until slightly puffy.
Add salt and flour to wet mixture. Mix on low speed, gradually increasing the speed to medium. Continue mixing until all flour is incorporated and the dough is pulling away from the sides and bottom of the bowl. Add additional flour until the dough pulls away from the bowl and is no longer super sticky. Transfer dough to a clean work area, knead by hand for 3-5 minutes, shaping into a ball.
Grease a medium bowl with oil. Toss dough into bowl, then flip to coat all sides with oil. Cover with plastic wrap. Let sit in a warm location for an hour or until dough is doubled in size.
Preheat oven to 425 degrees. In a large stockpot, bring 2 quarts of water to a boil. Carefully and quickly, add baking soda.
Divide dough into 8 equal pieces. Roll each piece into a rope and cut into 1 inch pieces. Repeat process with all of the dough. Make sure to keep the dough that you aren't working with covered with plastic wrap until you're ready to roll and cut it.
Take out one or two nonstick baking sheets. Whisk one egg together with 1 tbsp water, set aside. Boil 10-15 pieces of cut dough at a time for 30-45 seconds. Remove with a slotted spoon and place on your baking sheet. Repeat until all of your dough pieces are boiled .Brush egg wash over dough pieces and sprinkle with course sea salt.
(I want to note that the original recipe calls for parchment paper covered baking sheets. My pretzels stuck to them and I lost the bottoms of the first batch, so the nonstick sheet worked best for me as they just slid off)
Bake for 15 minutes or until golden brown and continue with the rest of the dough.
Tuesday, September 20, 2011
Zucchini Fries
I have a massive love for sweet potato fries. When they brown and caramelize the flavor that mixes with the salt is unbelievable and I could eat them all day. I think that Adam gets tired of them and so one day he made us Zucchini Fries. I wanted to add them to our football sunday mix last week so this time I was in charge of preparing. The are a bit time consuming simply for the fact that they need to be thin in order to crisp up and reach the perfect consistency, but they are worth the effort and they reheat very well in the toaster oven (in fact I am eating leftovers right now as I watch Titanic!).
Zucchini Fries
2 large Zucchini - halved lengthwise and sliced thin
Italian Breadcrumbs
Kosher Salt
Pepper
TJ's Everyday Seasoning (although you can use anything on hand or nothing at all)
2 Eggs, whisked
Preheat the oven to 400 degrees. Mix all of the dry ingredients together in a shallow bowl.
Dredge zucchini strips in egg and then coat with the dry mix. Place on baking sheet and bake for 12 minutes. Flip and increase the temperature to 450 - bake another 12 minutes. Serve hot
Tuesday, July 26, 2011
PB & J Cookies
I have really been on a peanut butter kick, which is not like me and a pleasant change actually. I wanted to make these cookies a while ago but didn't have anyone to share them with and I was concerned about their freezing factor with the jelly. Turns out they are awesome from the freezer! I whipped up a batch and froze them, taking half to my parents house this weekend and leaving half for me. My sisters ate them all up and agreed that they weren't sure how jelly on a cookie would be but that it worked. For some reason my cookies flattened out, so next time I will try chilling the dough before I fill it with the nutella/jelly combo.
This cookie screams 'fun for kids' to me, too!
PB&J Cookies (from My Baking Heart)
1 c peanut butter
1 c sugar
1 lg egg
2 tbsp all-purpose flour
1/2 c jelly
2 tbsp Nutella (optional)
Preheat oven to 375 degrees F and line baking sheets with parchment paper. Combine peanut butter, sugar, egg, and flour in a large bowl & mix until well combined. Roll the dough into small balls and place on a baking sheet (about 15 to a sheet). The dough is a little crumbly, so I would squish each piece in my hands before rolling them into a ball shape.
Using a small rounded spoon, make an indent in the center of each cookie, deep enough to allow for jam filling. If using, place about a 1/4 teaspoon of Nutella into each cookie. Place about 1/2 to 1 teaspoon of Jelly on each cookie (don’t worry if the jelly overflows a little, it will pretty much hold its shape through the cooking process). Bake for 8-10 minutes. Let set and cool on a wire rack for about 10 minutes before eating.
This cookie screams 'fun for kids' to me, too!
PB&J Cookies (from My Baking Heart)
1 c peanut butter
1 c sugar
1 lg egg
2 tbsp all-purpose flour
1/2 c jelly
2 tbsp Nutella (optional)
Preheat oven to 375 degrees F and line baking sheets with parchment paper. Combine peanut butter, sugar, egg, and flour in a large bowl & mix until well combined. Roll the dough into small balls and place on a baking sheet (about 15 to a sheet). The dough is a little crumbly, so I would squish each piece in my hands before rolling them into a ball shape.
Using a small rounded spoon, make an indent in the center of each cookie, deep enough to allow for jam filling. If using, place about a 1/4 teaspoon of Nutella into each cookie. Place about 1/2 to 1 teaspoon of Jelly on each cookie (don’t worry if the jelly overflows a little, it will pretty much hold its shape through the cooking process). Bake for 8-10 minutes. Let set and cool on a wire rack for about 10 minutes before eating.
Wednesday, July 13, 2011
Pretzel Rolls
These pretzel rolls were one of the first things that I ever logged into my google reader as a must make. Obviously time got away from me and I just ended up making them yesterday. I was really surprised at how simple they were! I really recommend eating them fresh out of the oven, and if not you should warm them again in the oven before serving. They are pretty tasty and I will make them again for sandwiches!
Pretzel Rolls (from Homemade by Holman, originally Three Square)
This recipe made 8 rolls for the other bakers, but only 6 for me
2 3/4 cups bread flour
1 envelope quick-rising yeast
1 teaspoon salt
1 teaspoon sugar
1 c. plus 2 tbsp hot water (approx. 125F)
8 cups water
1/4 c. baking soda
2 tablespoons sugar
1 egg white, beaten to blend
Coarse salt
Combine bread flour, 1 envelope yeast, 1 teaspoon salt and 1 teaspoon sugar and blend. Gradually pour hot water, adding enough water to form smooth elastic dough. Knead for 1 minute. Grease medium bowl. Add dough to bowl, turning to coat. Cover bowl with plastic wrap, then towel; let dough rise in warm draft-free area until doubled in volume, about 35 minutes.
Flour clear area of counter. Punch dough down and knead on lightly floured surface until smooth. Divide into 8 pieces. Form each dough piece into ball. Place dough balls on prepared surface, flattening each slightly. Using serrated knife, cut X in top center of each dough ball. Cover with towel and let dough balls rise until almost doubled in volume, about 20 minutes.
Preheat oven to 375 degrees F. Bring 8 cups water to boil in large saucepan. Add baking soda and 2 tablespoons sugar. Add 4 rolls and cook 30 seconds per side. Using slotted spoon, transfer rolls to prepared sheet, arranging X side up. Repeat with remaining rolls.
Brush rolls with egg white glaze. Sprinkle rolls generously with coarse salt. Bake rolls until brown, about 25 minutes. Transfer to racks and cool 10 minutes. Serve rolls warm or room temperature.
Monday, March 21, 2011
Garlic Cheddar Biscuits
I have had these biscuits bookmarked/starred in my reader for over a year, courtesy of Stephanie Cooks. The thing I enjoy about red lobster is their biscuits, and I always happen to overindulge in them. I only go the that restaurant once every few years, so the fact that I waited so long to make these surprises me a bit. These are spectacluar. They are the most amazing combination of bread, cheese, garlic and salt. I could eat them all day and not care about anything else. I am not even exaggerating - they are that good! And there's really nothing else to say!
Garlic Cheddar Biscuits
made 6 large biscuits for me
2 cups Buttermilk Biscuit Mix (Bisquick of Jiffy)
1/2 tsp Garlic Powder
1.5 cups shredded Sharp Cheddar Cheese
2/3 cup Milk
2 tbsp Butter
1 tsp Oregano
1 tsp Garlic Salt
Preheat oven to 400 degrees
Stir biscuit mix, cheese and garlic powder until combined. Add milk and continue stirring. The mix should be thick.
Bake for 10 minutes or until lightly browned. Melt butter in a small bowl and add oregano and garlic salt. Using a pastry brush, brush the butter mix onto the tops of the biscuits.
Bake for another 2-5 minutes. Serve hot!
Garlic Cheddar Biscuits
made 6 large biscuits for me
2 cups Buttermilk Biscuit Mix (Bisquick of Jiffy)
1/2 tsp Garlic Powder
1.5 cups shredded Sharp Cheddar Cheese
2/3 cup Milk
2 tbsp Butter
1 tsp Oregano
1 tsp Garlic Salt
Preheat oven to 400 degrees
Stir biscuit mix, cheese and garlic powder until combined. Add milk and continue stirring. The mix should be thick.
Bake for 10 minutes or until lightly browned. Melt butter in a small bowl and add oregano and garlic salt. Using a pastry brush, brush the butter mix onto the tops of the biscuits.
Bake for another 2-5 minutes. Serve hot!
Labels:
freezer meal,
side,
sides,
Snack
Tuesday, February 8, 2011
Buffalo Chicken Layered Loaded Nachos
Nachos are a great game day snack, as well as a bbq, party, fiesta food. I love that they combine so many different textures and flavors. For the Superbowl I wanted to make them a little different, so I added buffalo chicken to them. Since we don't have a working oven yet, we threw them on the grill to melt the cheese and it worked out just fine, they were on indirect heat for about 20 minutes. Definitely go with the full fat cheese, as that melts much better than the 2%. And dont be stingy!
Layered Loaded Nachos (meat from allrecipes)
Chicken:
2-3 Chicken breasts, halved
1 bottle Franks Red Hot Sauce
1/2 of a 12oz packet Ranch Mix
2 tbsp Butter
Place all ingredients in a crockpot on low, for about 2- 4 hours. Check at 1 and 2 hours to see if chicken is fully cooked. If it is, shred and heat for another hour.
Nachos:
Tortilla Chips
Buffalo Chicken
2 Jalapenos, Sliced
1/2 Tomato, chopped
1/2 Red Onion, chopped
2 Slices Bacon, cooked and chopped
Cheese
In a baking pan, layer the bottom with chips. Add chicken and toppings, then add a large portion of cheese. Add another layer of chips, filling and cheese.
Place in an oven at 350 or on the grill (indirect heat) for about 20 minutes, until everything is melted through. Serve wit sour cream.
Layered Loaded Nachos (meat from allrecipes)
Chicken:
2-3 Chicken breasts, halved
1 bottle Franks Red Hot Sauce
1/2 of a 12oz packet Ranch Mix
2 tbsp Butter
Place all ingredients in a crockpot on low, for about 2- 4 hours. Check at 1 and 2 hours to see if chicken is fully cooked. If it is, shred and heat for another hour.
Nachos:
Tortilla Chips
Buffalo Chicken
2 Jalapenos, Sliced
1/2 Tomato, chopped
1/2 Red Onion, chopped
2 Slices Bacon, cooked and chopped
Cheese
In a baking pan, layer the bottom with chips. Add chicken and toppings, then add a large portion of cheese. Add another layer of chips, filling and cheese.
Place in an oven at 350 or on the grill (indirect heat) for about 20 minutes, until everything is melted through. Serve wit sour cream.
Tuesday, January 11, 2011
Cuban Quesadilla
Cubans are something that I really enjoy, but the thought of making them never comes to mind for me. Im not sure why, because when I see them I want one and when I drive past the Cuban Sandwich shop on the way to work I always want to stop in. A lightbulb went off when I saw this 'skinny' version on Gina's Skinny Recipes, and I decided that I really should be making this. Fast, low cal, cheap and yummy. You could even make these to bring to a party or serve yourself as snacks/apps to bring a healthy twist to a party. *Think: Superbowl done healthy*
Cuban Quesadilla (from Gina's Skinny recipes)
2 slices pork Pork (I used Publix' deli Spanish Pork)
1 slice Lacey Swiss Cheese
1 oz Ham
1 slice Kosher Pickle
Mustard
1 Ole Extreme Wellness Whole Wheat Wrap
Heat a non-stick pan over low heat. Spray with cooking spray and place tortilla on pan (so only half is being heated). On half of the tortilla, place a piece of cheese, pork, ham, pickle and mustard. When cheese is melted, fold the quesadilla in half and flip to heat other side.
Cuban Quesadilla (from Gina's Skinny recipes)
2 slices pork Pork (I used Publix' deli Spanish Pork)
1 slice Lacey Swiss Cheese
1 oz Ham
1 slice Kosher Pickle
Mustard
1 Ole Extreme Wellness Whole Wheat Wrap
Heat a non-stick pan over low heat. Spray with cooking spray and place tortilla on pan (so only half is being heated). On half of the tortilla, place a piece of cheese, pork, ham, pickle and mustard. When cheese is melted, fold the quesadilla in half and flip to heat other side.
Thursday, October 21, 2010
White Chocolate Snack Mix
This white chocolate snack mix recipe has been sitting in my google reader for months now, from the blog Apple A Day. It is really a simple idea that I know has been done before, but I have never had a reason to create it. Now I have, and this could be addicting! I have had my eye out for Halloween m&ms for about a month, and still have not found them. You know, the purple green and black ones. So here I sat yesterday, picking the red, brown, orange and yellow m&ms out of a regular old bag. I also got cheap and used Publix brand Crispex instead of Chex, but I am positive that it tastes exactly the same.
You can add anything to this mix. Nuts, coconut, milk/dark chocolate, etc, etc. I love when people make this in the winter with milk chocolate and powdered sugar, so that will probably be my Christmas holiday version.
White Chocolate Snack Mix (from Apple A Day)
8 cups Chex or Crispex Cereal
8 oz white chocolate
1.5 cups M&Ms
2 cup mini pretzels
1 tbsp oil
Using a double boiler, melt the white chocolate on low heat with the oil - to loosen up the chocolate.
Place all other ingredients into a large bowl. When Chocolate is melted, pour into the bowl and use a large spoon to mix until everything is covered with chocolate.
Spread out on parchment paper to dry, about 2 hours. Break large pieces apart. This can be stored for about a week in an airtight container.
Subscribe to:
Posts (Atom)


