Pages

Showing posts with label appetizer. Show all posts

Thursday, January 31, 2013

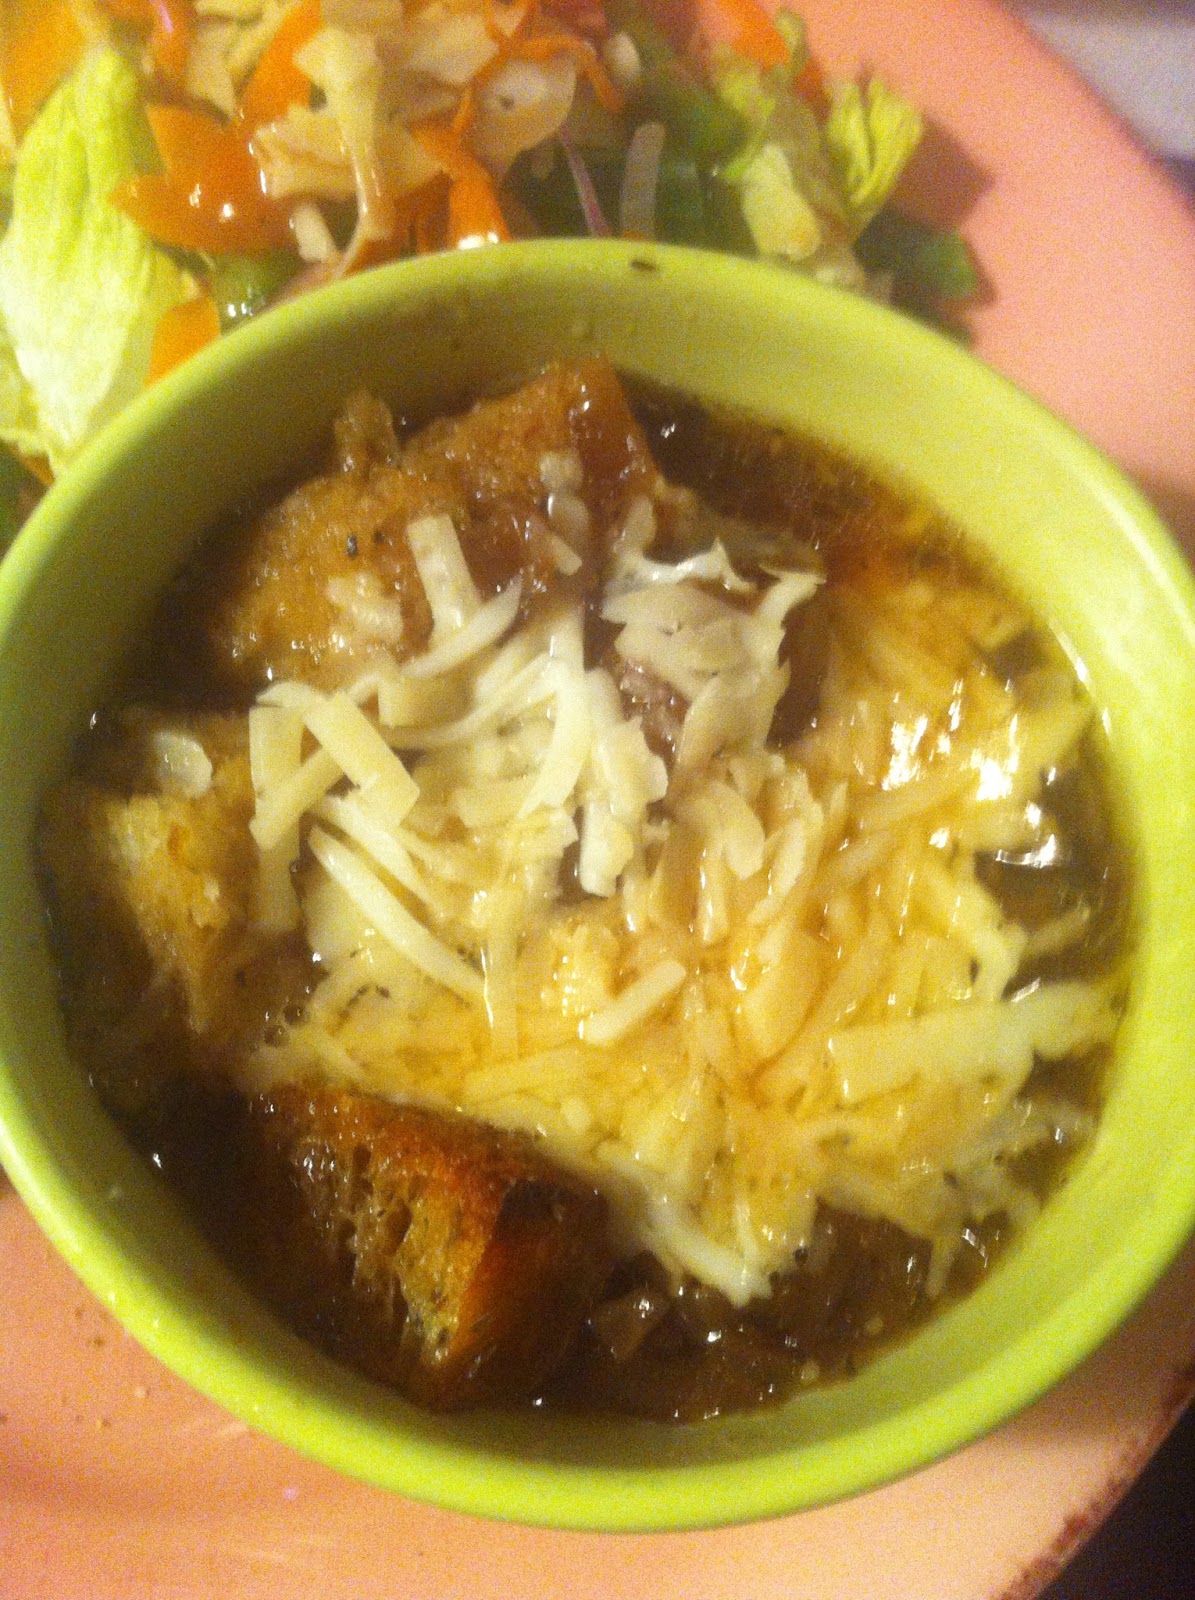
Crock Pot French Onion Soup


We are still in the season of soups. January is, I think, the coldest month most places so I know that a lot of you are still dreading going outside. You're bundling up and enjoying time on the couch, by the fire, drinking tea or coffee or hot chocolate. Well, I am anyway and I'm not really North!

I found this recipe on Pinterest way back and finally gave it a try. It is the best crock pot meal that I've ever tasted. The work of caramelizing the onions before hand really pays off with the flavor. I went the route of making croutons and I didnt broil with the cheese. You'll see the way I did it below but feel free to go to the original source and see what they did. Either way you finish it off, the flavor of this soup is the same as restaurant quality - I promise!

French Onion Soup (adapted from All Recipes)
6 tablespoons butter
4 large yellow onions, sliced and separated into rings
1 tablespoon white sugar
2 cloves garlic, minced
1/2 cup cooking sherry
7 cups reduced-sodium beef broth
1 teaspoon sea salt, or to taste
1/4 teaspoon dried thyme
1 bay leaf

French Bread, cubed
Olive Oil
Onion Powder, Garlic salt, Garlic Powder, Oregano, Basil (or any seasonings you want/have)

1/2 cup shredded Swiss cheese
1/3 cup shredded Asiago cheese
1/4 cup freshly shredded Parmesan cheese
2 tablespoons shredded mozzarella cheese

Heat butter in a large, heavy pot over medium-high heat; cook and stir onions until they become translucent, about 10 minutes. Sprinkle onions with sugar; reduce heat to medium. Cook, stirring constantly, until onions are soft and browned, at least 30 minutes. Stir in garlic and cook until fragrant, about 1 minute.

Stir sherry into onion mixture and scrape bottom of pot to dissolve small bits of browned food from the pot. Transfer onions into a slow cooker and pour in beef broth. Season to taste with sea salt; stir in thyme and bay leaf. Cover cooker, set on High, and cook 4 to 6 hours. If desired, set on Low and cook 8 to 10 hours.

At any point you can make your croutons. Simply toss the bread in a large bowl with olive oil. then add your seasonings and toss again, to coat each piece. Spread on a baking sheet and bake at 375 for 4 minutes or so, turning half way through.

When soup is done, ladle into bowls, then add croutons and sprinkle your cheese mixture on top. Let sit for a minute or 2 so that the cheese can melt from the heat of your soup.

Monday, January 28, 2013

BBQ Chicken Cauliflower Pizza


To go along with my Cauliflower Pizza Crust post, here is the first version of pizza that I made.

I sliced my pizzas into 4 rectangles each, so I think this could be a really nice appetizer or party food. You could top them all differently or all the same and it would be so easy to throw together.

BBQ Chicken Cauliflower Pizza
Cauliflower Crust
2 BBQ Chicken Breasts - see below
2 Tbsp BBQ Sauce
Mozzarella Cheese
Basil
1/2 Green Pepper, sliced thin
1/4 Red onion, sliced thin
Salt
Pepper
Garlic Powder

Preheat oven to 450 degrees (it should already be set from your crust)

Sprinkle Salt and pepper onto the baked crust. Then place a small amount of mozzarella on the crust (just enough to hold everything in place)

Top with Basil, Chicken, Onion and Pepper and put some BBQ sauce on as well (about 1 tbsp per pizza if you're making 2). Then top with more cheese and a dash of garlic powder.

Bake about 10 minutes, or until cheese is melted.

*For the Chicken breasts, I pounded them thin and seasoned with salt, pepper, garlic powder, onion powder and a little crushed red pepper (not flakes, crushed). I baked at 375 for about 15 minutes, then turned it down to 350 degrees and brushed BBQ sauce onto both sides and cooked for another 4 minutes. then I sliced them into strips and tossed with a tiny bit more sauce.

Tuesday, November 13, 2012

Cheesy Vegetable Chowder


I have a real love for Panera's Broccoli Cheddar Soup. In fact, I get it 99.9% of the time that I go there. It can be 100 degrees out and I will order my soup with a smoked turkey sandwich (or a sierra turkey if I really want to be bad). The calories aren't really that high for the 1/2 portion, but when I moved to Nashville I moved away from Panera. I have one by work, but I really don't have time to get there and it isn't conveniently on my way home (especially now that I have a baby in tow).

Anyway, I can safely say that I was having some serious withdrawls. Especially when the fall weather hit, I needed some soup and stat. Enter in Pinterest. Adam helped me whip up this soup and it was seriously so easy and so delicious. We both really enjoyed this and next time I will double the recipe and freeze half.

I love that there is no heavy cream involved. And I used skim milk. It was still creamy and perfect with a baguette, a la panera :) the only thing that I had to change was the rue (the water and flour mix) - the soup wasn't thickening up enough so at the end we added in another portion of rue, only less water and more flour - and it thickened up perfectly. So you may have to play around with that, but leave it until the end to see. Sorry for the crap pic, we ate it at night and had no leftover to photograph the next day.

Cheesy Vegetable Chowder (from LuLu the Baker)
2 Tablespoons butter
1/2 cup chopped onion
1 cup finely chopped carrot
1 celery stick, finely chopped
1 Tablespoon minced garlic
4 cups chicken broth 1 Tablespoon flour
1/2 cup water
2/3 cup milk
2 cups chopped broccoli
2 heaping cups shredded cheddar cheese
Melt the butter in a large soup pot.  Add onions, carrots, and celery and saute over medium heat until tender.  Add garlic and cook 1 or 2 additional minutes. 
Add chicken broth and potatoes, bring to a boil, and cook 25-30 minutes.  
Mix flour with water, add, and simmer until soup is slightly thickened.  
Add milk and broccoli and cook until broccoli is just tender and soup is heated through.  Stir in cheese, allow to melt, and serve.

Monday, November 12, 2012

Biggest Loser Sweet Potato Skins


Fall Sundays = Football. Football = Snacks. Snacks = High Calorie Yumminess.

I love to snack. I love to pick out what Im going to make, prep it, whip it up and sit back and enjoy it. Any time of sport is the perfect excuse for eating snacks. All day. I dont care what sport it is, just let me eat while I watch and it'll all be ok. Of course, if you care at all about what you're putting into your body then you probably have a guilty feeling after the day is over and you go to tally your calories.

So, I've turned to pinterest for my spruced up versions of typical snacks. For example - potato skins. You love them loaded with gooey, stringy cheese and bacon, sour cream and chives. I promise you that this skinny version tastes just as fantastic. The spices give it a kick and a flavor that just mixes really well with the sweetness of the potato. Try this and I promise it won't disappoint. It would even be perfect for your holiday party since it's in and out of the oven then onto the table.

Biggest Loser Sweet Potato Skins (slightly adapted from prevention.com)
16 ounces, 1/2"-thick sweet potatoes (I have no clue how many ounces I used but I did about 2 medium sized potatoes)
1 teaspoon olive oil
1/8 teaspoon sea salt
1/8 teaspoon garlic powder
1/8 teaspoon cayenne, or to taste
2 ounces shredded  low-fat Cheddar cheese
3 strips Turkey Bacon, cooked and crumbled
2 tbs finely chopped scallions (i personally don't think you can ever have enough green onion so I load it on)
2 tablespoons Fat Free Sour Cream

Preheat the oven to 450°F. Line a baking sheet with foil.

In a large bowl, toss the potatoes and oil together until the potatoes are well coated.

Place the potato rounds in a single layer on the prepared pan so they do not touch. Sprinkle the salt, garlic powder, and cayenne evenly over the top of the potatoes. Bake them for 10 minutes. Flip them and bake for 7 to 9 minutes longer, or until they are tender inside and starting to brown lightly on the outside.

Push the potato rounds together so that they touch and you can easily top them in a single, even layer. First place the Cheddar, then the bacon, and then the scallions over the rounds. Bake for 2 to 3 minutes, or until the cheese is melted.

Serve immediately with sour cream.

Thursday, August 23, 2012

Chipotle Honey Chicken Poppers


One day during my pinning frenzy I came across these yummy looking little chicken nuggets - err, poppers. I happily pinned them to 'Food!' and after making then, they definitely deserve the exclamation point! Who would have thought that these bite size chicken poppers could pack such flavor and make an awesome meal for two grown adults?

The breading on these is just the best - we have started to use it as our go-to berading recipe. It leaves a crisp shell and really sticks well to your food. The sauce on these is great. It had a little kick at the end but nothing too powerful. I can definitely see myself serving these as an app or party food, plus it's going into our dinner rotation. Since there's a breading I just left out a carb side and we had the chicken and veggies - filling enough!

*Note - I subbed 2 ingredients, which I have shown below. It still came out really yummy and I didn't have to go buy more ingredients from the store which is always a plus!

Chipotle Honey Chicken Poppers (from Table for Two)
5 chicken tenderloins, cubed

For the Sauce:
2/3 cup honey (I used agave)
1/4 cup water
1/4 cup ketchup
1 tbsp. white vinegar
2 tsp. chipotle powder (I used Mexican Chili Powder. Regular Chili Powder would work also)
1/2 tsp. salt

For the Egg Mix:
1 egg, beaten
1/2 cup milk

For the Breading:
1/2 cup all purpose flour
1/2 cup Panko breadcrumbs
1 tsp. salt
1/2 tsp ground pepper
1/4 tsp. garlic powder
1/4 tsp. dried basil

Prepare a plate lined with paper towels for the chicken after it’s done cooking in the oil. Set aside.

Combine all the ingredients for the sauce in a small saucepan and bring to a boil, stirring to mix. Turn off the heat and set aside.

In a small, shallow dish, combine the egg and milk. Set aside.

In another shallow dish, combine the ingredients for the breading. Set aside.

Bread the chicken cubes by first coating it in the bread mixture then the egg wash then back in the breading. Put the coated chicken cubes on a plate. Continue until all the chicken have been breaded.

Pop the plate of chicken in the fridge for about 20 minutes. It’ll help the breading stick to the chicken.

In a large skillet, add a thin layer of vegetable oil and place over medium high heat.

Once the oil is glistening, add in the chicken (I did it in 2 batches so you don’t overcrowd the pan) and cook the chicken until it’s cooked through & the breading is nice and crispy brown.

Once the first batch is done, put the cooked chicken on the prepared plate with the paper towel. Continue with the second batch and once that’s cooked, add that to the prepared plate.

In a large bowl, put in your cooked chicken and pour the sauce all over. Toss well to coat every bite.

Tuesday, June 7, 2011

Adam's Coconut Shrimp and Sweet Mustard Dipping Sauce


Adam decided that for an appetizer we should have some coconut shrimp, which is his absolute favorite thing to get when we go out. He pulled a recipe from allrecipes.com and we were pretty shocked by how amazing it turned out. Definitely go with this if you're looking for a good breading! We made up a dipping sauce and devoured them all!

Coconut Shrimp (from allrecipes.com)
1 egg
1/2 cup all-purpose flour
2/3 cup Sam Adams Summer Al
1 1/2 teaspoons baking powder
1/4 cup all-purpose flour
2 cups flaked coconut
24 shrimp
3 cups Vegetable oil for frying


In medium bowl, combine egg, 1/2 cup flour, beer and baking powder. Place 1/4 cup flour and coconut in two separate bowls. 

Hold shrimp by tail, and dredge in flour, shaking off excess flour. Dip in egg/beer batter; allow excess to drip off. Roll shrimp in coconut, and place on a baking sheet lined with wax paper. Refrigerate for 30 minutes. Meanwhile, heat oil to 350 degrees F (175 degrees C) in a deep-fryer. 

Fry shrimp in batches: cook, turning once, for 2 to 3 minutes, or until golden brown. Using tongs, remove shrimp to paper towels to drain. Serve warm with your favorite dipping sauce. 


Sweet Mustard Dipping Sauce
3 tbsp Horseradish Mustard
1 tbsp Agave Nectar
1 tbsp Light Mayo

Combine all and stir until all lumps are mixed in.

Tuesday, February 8, 2011

Buffalo Chicken Layered Loaded Nachos

 Nachos are a great game day snack, as well as a bbq, party, fiesta food. I love that they combine so many different textures and flavors. For the Superbowl I wanted to make them a little different, so I added buffalo chicken to them. Since we don't have a working oven yet, we threw them on the grill to melt the cheese and it worked out just fine, they were on indirect heat for about 20 minutes. Definitely go with the full fat cheese, as that melts much better than the 2%. And dont be stingy!

Layered Loaded Nachos (meat from allrecipes)
Chicken:
2-3 Chicken breasts, halved
1 bottle Franks Red Hot Sauce
1/2 of a 12oz packet Ranch Mix
2 tbsp Butter

Place all ingredients in a crockpot on low, for about 2- 4 hours. Check at 1 and 2 hours to see if chicken is fully cooked. If it is, shred and heat for another hour.

Nachos:
Tortilla Chips
Buffalo Chicken
2 Jalapenos, Sliced
1/2 Tomato, chopped
1/2 Red Onion, chopped
2 Slices Bacon, cooked and chopped
Cheese

In a baking pan, layer the bottom with chips. Add chicken and toppings, then add a large portion of cheese. Add another layer of chips, filling and cheese.

Place in an oven at 350 or on the grill (indirect heat) for about 20 minutes, until everything is melted through. Serve wit sour cream.

Tuesday, January 11, 2011

Cuban Quesadilla

 Cubans are something that I really enjoy, but the thought of making them never comes to mind for me. Im not sure why, because when I see them I want one and when I drive past the Cuban Sandwich shop on the way to work I always want to stop in. A lightbulb went off when I saw this 'skinny' version on Gina's Skinny Recipes, and I decided that I really should be making this. Fast, low cal, cheap and yummy. You could even make these to bring to a party or serve yourself as snacks/apps to bring a healthy twist to a party. *Think: Superbowl done healthy*

Cuban Quesadilla (from Gina's Skinny recipes)
2 slices pork Pork (I used Publix' deli Spanish Pork)
1 slice Lacey Swiss Cheese
1 oz Ham 
1 slice Kosher Pickle
Mustard
1 Ole Extreme Wellness Whole Wheat Wrap

Heat a non-stick pan over low heat. Spray with cooking spray and place tortilla on pan (so only half is being heated). On half of the tortilla, place a piece of cheese, pork, ham, pickle and mustard. When cheese is melted, fold the quesadilla in half and flip to heat other side.

Sunday, October 24, 2010

Buffalo Chicken Salad

Chicken is amazing because you can do so many things with it. I wanted to put together sandwiches for a party, but I didn't want to use just a regular chicken salad so I decided to try a buffalo chicken salad. I love buffalo sauce, and having it on something other than calorie heavy wings is a nice change. I put this on bread and then we also put it on pizza crust, topped with mozzarella cheese. Everyone enjoyed this salad and I will be making it again. You could make this and have it for dinner or lunch in different ways, making it a time saver also.

Buffalo Chicken Salad
2 Chicken Breasts, shredded
1/3 cup Light Mayo
1.5 tbs Franks
1/2 tbsp Light Ranch
S&P
1 Stick Celery, chopped

Combine all and let chill in the fridge. Easy!

Basic Egg Salad

Hard boiled eggs are something that people seem to love or hate. The texture doesn't suit everyones taste, but for me I have always really enjoyed them. Deviled eggs and egg salad, crumbled on salads or just plain out of the shell, I can eat them anyway. Besides the boiling of the eggs and the cooling time, this is probably the easiest thing to pull together when you need something quick. Throw it on bagels, bread or crackers and go!

Basic Egg Salad
1 dozen Eggs, hard boiled and fork mashed
1/2 cup Light Mayo
S&P to taste

Mix all in a large bowl until mayo is evenly combined. Let chill in the fridge and serve.

Pumpkin Cream Cheese Wontons

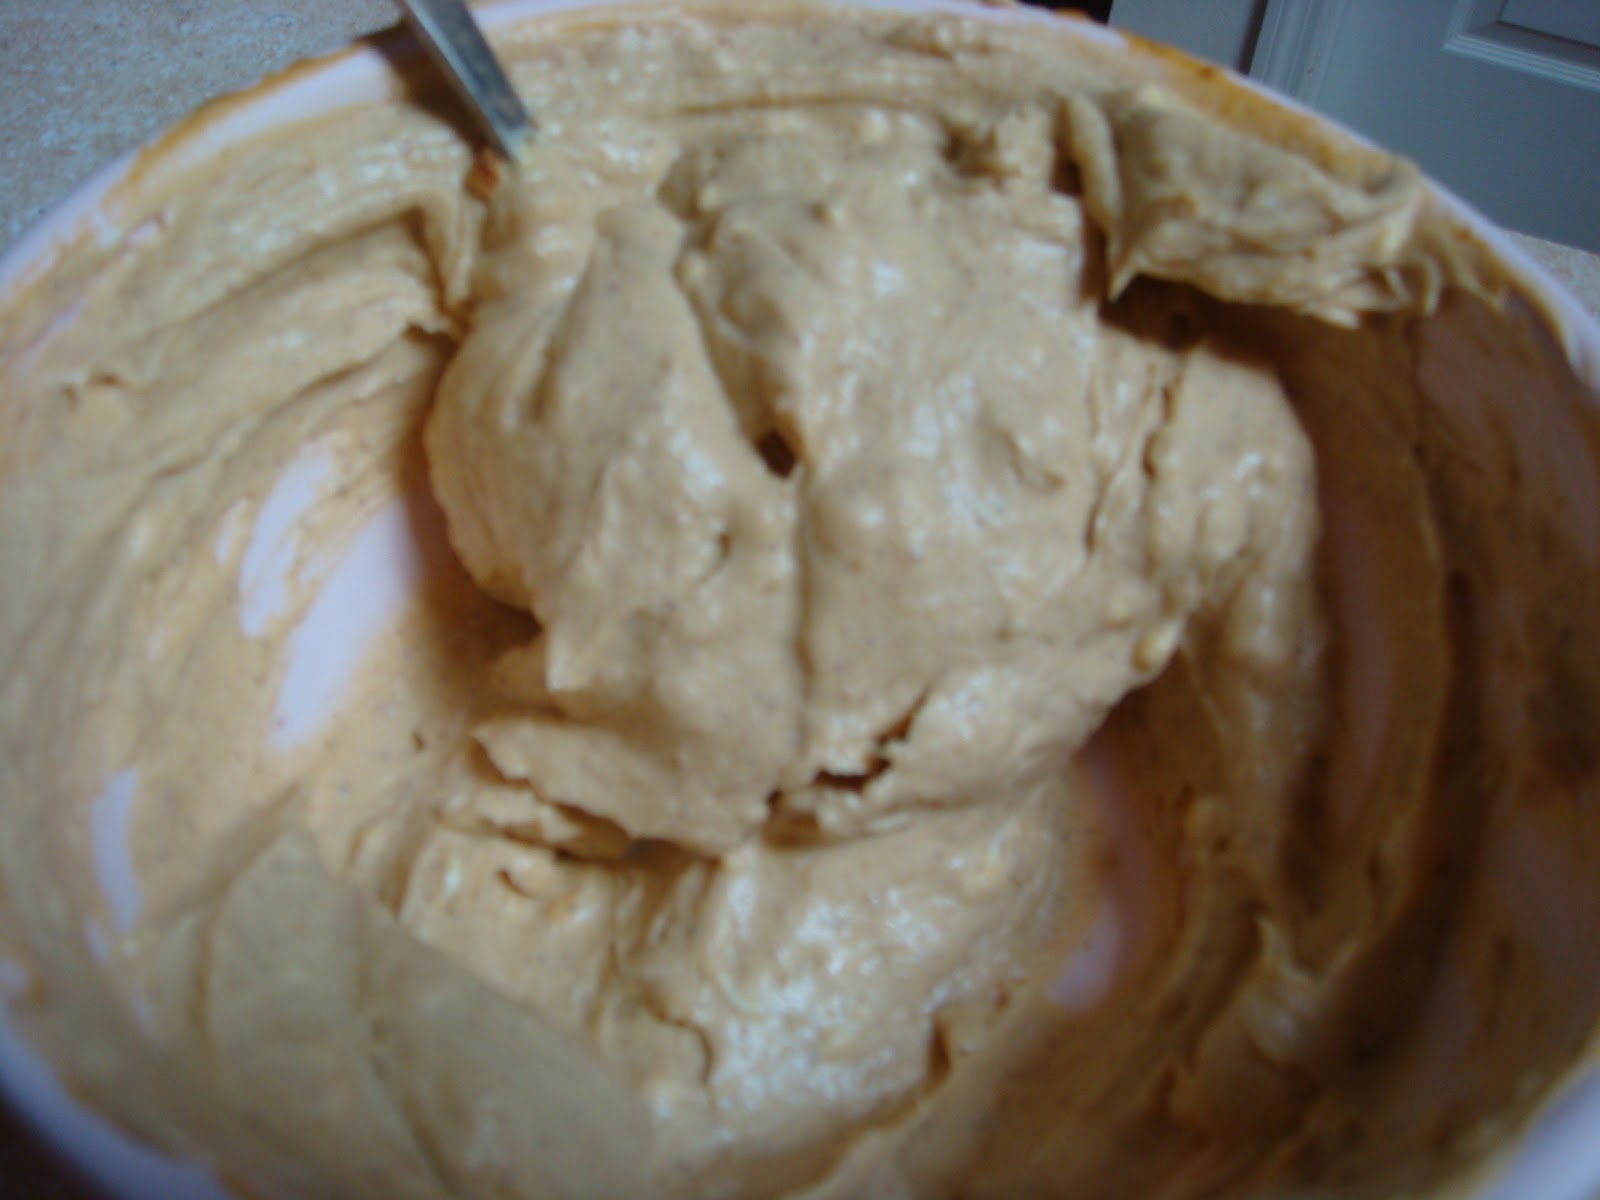
I have been wanting to make pumpkin wontons ever since I saw this recipe on Big Head in the Kitchen, so a party was the ideal time to try them out because I knew that there would be other pumpkin lovers there. When I got the ingredients I didn't look at the recipe, because I actually had an idea in my head of what they would be and then when I looked at the recipe I realized that I really wasn't even making that. I made a pumpkin cream cheese, which would actually be really good on bagel or with bagel chips, apple slices, etc.

I went ahead and put this mix into wonton wrappers and baked. They were a big hit among everyone who likes pumpkin, which I enjoyed since usually I am the only one who will eat this sort of thing. Since I put these in the oven mid-party, I wasn't able to snap a photo and they were all gone within 30 minutes so there were no leftovers either.

Pumpkin Cream Cheese Wontons
14 Square Wonton Wrappers
4oz reduced fat Cream Cheese, softened
1/4 c Pumpkin Puree
1 tsp Brown Sugar
1/4 tsp Cinnamon
1/4 tsp Pumpkin Pie Spice

Preheat oven to 350 degrees,

Combine items 2-6 in a bowl and mix until smooth. Add about 1 tsp of mixture to the center of the wonton, then wet all edges of the wrapper and fold one side over, pressing sides to seal.

Spray each wonton with cooking spray on both sides,  cook for 15 minutes, flip and cook 4 minutes more. Sprinkle with cinnamon and serve.

Monday, September 27, 2010

Halloween Party Prep

About 2 months ago or so, Adam and I threw around the idea of hosting a Halloween party in Gainesville. I love the creativeness that goes into the holiday and even without a party I would still want to decorate and make some spooky themed foods. There are so many neat ideas out there that it is hard to not want to try some things out.

Once Septmeber hit, it seemed like most every store had their decoration displays up, so we started shopping around for things. We ended up getting a lot of things at the dollar store, and then some at party city. We are trying to do this on a budget, so we have really been able to stick to that so far. I have literally drawn up 'blueprints' of the rooms and started planning what all I think we should do. I have decided to go with a 'Chop House' theme that includes lots of blood and body parts! We will actually be decorating this coming weekend (update: decorations go up!), as it's the last time I will be in Gainesville until party weekend, and we need to see what all else we need to get. I'm excited to see how this will all come together!

Of course, planning the menu was the first thing that I did. I have been infusing vodka with candy corn for about a month now, since the sugar will add a lot of flavor to the vodka I'm hoping to turn this into shots to take out of the test tubes that I picked up. Bloody Marys, rum and coke, and purple/orange gatorade with vodka will be on the drink menu along with your usual beer choices.

I want to do a heavy appetizer spread, as that party is at 7 so most people probably will have already eaten something. Here's what I think the final menu will be:
Garlic Brie in a breadbowl, served with apple slices, crackers and bread
Pukin' Pumpkin Dip - Spinach Dip served with Crackers
Buffalo Chicken Dip served in a mini pumpkin with crackers and possibly celery sticks
Candy Corn Pizza
Eyeballs - Meatballs in the crockpot
Baby's Fingers - cocktail weiner pigs in a blanket with almonds for fingernails
Ghost sandwiches - Egg salad and buffalo chicken salad on pumpernickle bread, cut into ghosts
Macaroni and Cheese

For Dessert:
White Chocolate Snack Mix, made with halloween colored candy
Candy Corn Bark
Chocolate Chip Cookies - a few that I froze with halloween sprinkles
Candy Bowl

I am also very excited that my sisters will be coming up and staying the night, so I will need to get some easy things for breakfast. Maybe just bagels as I hope to have had too much fun the night before to be able to do too much too early!

Tuesday, September 21, 2010

Brie Stuffed Mushrooms

I somehow forgot to post these mushrooms that I made over the weekend. I got the recipe from Lauren's Kitchen, and it was originally from the Pioneer Woman.  For some reason, mine came out very liquidy, and nothing like the picture I was going off of! Maybe it was too much butter that they were tossed in? That's really all that I can think of that would cause this problem, unless maybe they were cooked too long. They were tasty, although I think next time I will try to make the cap bigger so that the brie doesn't ooze as much. When mshrooms and brie are involved, there's really no way to go wrong so I will definitely make these again. Practice makes perfect!

Brie Stuffed Mushrooms (from Lauren's Kitchen)
1 package White Button Mushrooms, Washed And Stems Removed
4 cloves Garlic, Minced
¼ cups Flat-leaf Parsley, Chopped
4 whole (to 5) Green Onions, Sliced (up To Middle Of Dark Green Part)
Splash Of White Wine (optional) - I did not use this
1 slice (wedge) Of Brie Cheese

Preheat oven to 350 degrees

Melt butter in large saucepan. Add mushroom caps and toss to coat in butter. Sprinkle lightly with salt and cook for 1 minute. Remove mushrooms from pan and place upside down in a baking dish.

In the same saucepan (without cleaning it) throw in garlic, parsley, and green onions. Sprinkle very lightly with salt and splash in wine, if using. Stir around until wine evaporates, about 1 minute. Remove from heat.

Cut rind off of brie wedge, then cut pieces of brie to fit each mushroom cap. Place inside, lightly pressing to anchor each piece of brie.

Top mushrooms with onion mixture.

Place into the oven for 15 minutes, or until brie is melted.

Note: mushrooms are best when they’ve been allowed to cool slightly. Delicious

Monday, September 6, 2010

Ale House Jalapeno Poppers

One of the best bars around here is the Ale House, and Kellys favorite thing to eat is their jalapeno poppers. A few years ago she decided it would be easy to create these at home, and so she did. They are easy with few ingredients and cook up fast, the only thing that takes time is putting them together. We usually always have these at partys and Adam and I make them a lot when we eat mexican at home. They are best served with a sweet chili sauce, found in the ethnic aisle at your grocery store.

Jalapeno Poppers
Jalapenos, de-seeded and sliced
8oz Cream Cheese, 1/3 reduced fat works well
Wonton Wrappers
Canola/Vegetable Oil for frying
Bowl of Water

Working with one wonton wrapper at a time, add about a teaspoon of cream cheese to the center and then place on slice of jalapeno on top. Fold one side of the wrapper on top of the filling and dab some water on top. Fold the other end over on top and then the two remaining sides on top also. Use water to seal the creases.

Once all of your poppers are put together, heat oil on medium-high heat in a skillet. Place poppers in, turning once browned on the bottom. Remove when both sides are bubbly and cooked.

Sunday, June 13, 2010

Tomato/Mozzarella/Basil 'Skewers'

I was looking for an easy and light app to make this weekend, and this is always a good combination. The way I see it, you just can't go wrong with cheese tomato and basil. Adam has been growing some veggies and herbs, but the tomatoes weren't ripe yet, so we only got to use the basil from the 'garden'. It's something that isn't too filling and is fun to munch on. I read about people putting these on wooden skewers for parties and such, but since it was just two of us I stuck them on toothpicks. I snapped this picture before I drizzled balsamic vinegar on the bottom of the plate, this lets the cheese soak all of the flavor up. But that's another good thing about this, it can be made in advance and placed in the fridge until you're ready.

Tomato/Mozzarella/Basil 'Skewers'
Large Tomatoes
Fresh Basil Leaves
Balsamic Vinegar
Wood Skewers or Toothpicks

Cube mozzarella and tomato. Cut large basil leaves in half. Place on your skewer or toothpick and arrange on a plate.

If using toothpicks, drizzle balsamic vinegar on hte bottom of the dish until it covers all servings. If using skewers, you can drizzle on top of them.

Wednesday, June 2, 2010

Stuffed Jalapenos on the Grill

I think that these stuffed jalapenos recieved the most rave review of anything that I have made. They flew from the plate and bites were followed with 'mmmm's. I should have made more, but was unsure of how they would turn out. These weren't too hot, but when I made them again on Monday (yes, Adam had requested them again because they were really that good) they were much spicier. I guess it can just depend on the day you get your peppers and the ripeness of them. I was inspired by this recipe that I found, because it was on the grill and just a little different than others. You have to make sure to get the widest peppers that you can, because stuffing them can be difficult. I had to use the handle end of a baby spoon to fill them completely. Other than that, it was a breeze to make and cook!

Stuffed Jalapenos on the Grill
Large Jalapenos
8oz Cream Cheese, softened (I used 1/3 fat)
8oz Sharp Cheddar, shredded finely, plus 1/4 cup
Bacon slices, raw
Kosher Salt
Garlic Salt
Metal or Wooden Skewers
Baking Pan


Let your cream cheese block soften. Once it is mixable, combine with the cheddar, pinch of salt and some garlic powder. Make sure it is well blended.

Begin by slicing the tops off of the peppers and using a paring knife to hollow out the inside. Make sure to get rid of everything, even at the bottom. If you dont, then people will get a huge surprise when they take that last bite!

Using the end of a small spoon, fill the peppers with the cheese mixture. Do not try to put all of the filling in at once, if you do then it will not get to the bottom of the pepper. Spoon a few scoops in. Fill to the top and then dip the opening in the extra cheddar.


Take the top of your pepper and spread a little of the cream cheese mix on top and place on the bottom, to make the pepper whole again. Take 1/2 slice of bacon and wrap around jalapeno, then skewer. Work with one pepper at a time. Place the skewer on a baking pan.

Heat half of your grill on high, and the other half on low. Place the baking pan on the low heat side and cook, covered, for 20-30 minutes.


Memorial Day KickOff

Another Memorial Day has passed, and I am still struggling to transition back to normal life. We had a weekend where we literally did nothing after Friday, up until Tuesday morning when it was time to work. Our party on Friday was a hit and a lot of fun. It was nice to meet everyone and be able to kickoff the weekend on a fun note. I lessened the food when we got the final number of people who were attending, and still had too much, of course, of some things while others flew off the plates.

To my surprise, hardly any of the cheese was touched. I know that people usually don't want to be the first to eat, which is fine and since I have a strong love for cheese, I didnt mind it as leftovers!

Cheese Plate

I cut up some cabot hot habanero, cheddar and colby, paired with a garlic/herb soft cheese and served with wheat thins, everything flatbreads and grapes.

I also made a pastry wrapped baked brie. I bought the premade pastry rounds that you find in the refridgerated cookie dough isle, covered the wheel of brie completely and baked at 320 for about 30 minutes.

Monday, March 29, 2010

Stuffed Mushrooms

One thing I really wanted to make recently was stuffed mushrooms. I had found this recipe on allrecipes.com a little while back and wanted to try it. With over 1,300 reviews and a 4.5 rating, it had to be good. We really enjoyed them, especially the nice spicy kick that was unexpected. I only made a few changes, but would definitely recommend these! I had followed a few reviews that said to place in mini muffin trays to bake, but I would recommend just cutting a bit of the round part off so they stand up on a baking sheet. I found they did not brown as well in the muffin tray.

Stuffed Mushrooms (from allrecipes.com)
12 whole fresh mushrooms (I used 24 medium/small sized white mushrooms)
1 tablespoon vegetable oil (I used extra vigrin olive oil)
1 tablespoon minced garlic
1 (8 ounce) package cream cheese, softened
1/4 cup grated Parmesan cheese
1/4 teaspoon ground black pepper
1/4 teaspoon onion powder
1/4 teaspoon ground cayenne pepper
3 tbsp Butter, Melted
3 Green Onions, chopped


Preheat oven to 350 degrees F (175 degrees C). Spray a baking sheet with cooking spray. Clean mushrooms with a damp paper towel. Carefully break off stems. Chop stems extremely fine, discarding tough end of stems.

Heat oil in a large skillet over medium heat. Add garlic and chopped mushroom stems to the skillet. Fry until any moisture has disappeared, taking care not to burn garlic. Set aside to cool.

While mixture is cooling, slice off any roundness on the mushroom caps that may make them roll while baking. Melt butter and brush over the caps, this should make them brown up.

When garlic and mushroom mixture is no longer hot, stir in cream cheese, Parmesan cheese, black pepper, onion powder, cayenne pepper and green onion. Mixture should be very thick. Using a little spoon, fill each mushroom cap with a generous amount of stuffing. Arrange the mushroom caps on prepared cookie sheet.

Bake for 20 minutes in the preheated oven, or until the mushrooms are piping hot and liquid starts to form under caps.

Tuesday, March 16, 2010

Roasted Cuban Bread from Bahama Breeze

Bahama Breeze is one place where I definitely like to order the same thing everytime I go. One of those things is the Cuban Bread. It seems so simple, yet it is amazing and so much better than bruschetta. I recently found a lot of the recipes on their website, including the Roasted Cuban Bread Recipe. I tried it out and it tastes exactly like the restaurant, which makes me so happy because the closest location is about 40 minutes away from me. Now I can have this anytime I want! We devoured an entire loaf of cuban bread in one night with this.

The tomato marinade and butter spread is what makes this so good, I think soaking the tomatoes for a few hours would be a good idea, but I cant imagine it being better than it was.

You can go to the Bhama Breeze site to find other recipes, although I cannot vouch for those. Here is a direct link to this recipe.

Thursday, January 28, 2010

Buffalo Pita Pizza

Ever since a few nights ago I have been craving buffalo pizza. Knowing that this doesn't exactly fit into my diet, and I have so much homework to get done tonight, I decided to make the fastest, healthiest version that I could. As I sit here and chew away, my craving is satisfied and I feel good about my dinner choice! I cooked up some veggies with this and it took about 10 minutes total. There are so many variations you could do with toppings on this, I think it will become a new staple or make your own here!

Buffalo Pita Pizza
Whole Wheat Pita, cut in half
Hot Sauce
FF Ranch
Cheddar, shredded, ff
Mozzarella, shredded
Onion, chopped
Garlic Powder

Preheat oven to 370 degrees. Spray a skillet and put on high heat. Place pita in until crisp, flip and cook for another few seconds.

Place pita on baking sheet. Add ranch, hot sauce and half of the cheese, then add onion, the rest of the cheese and more hot sauce. Sprinkle garlic powder on top.

Bake for 7 minutes.